In recent years, the issue of how to make 3D-printed models in multiple colors has come to the fore. One of the major issues is that traditional extrusion methods rely on printing using single strands of filament. Though this technique has proved useful, it does not lend itself easily to multicolor printing.
Nonetheless, creators, manufacturers and innovators have devised a range of solutions to enable makers to print in different colors. In this article, we’ll cover some of the methods that are making full-color 3D printing a reality.
Table of contents
- Why is multicolor 3D printing important?
- Printing objects separately
- Pausing mid-print
- Printing with multiple nozzles
- One nozzle with multiple spools of filament
- Non-extrusion-based methods
Why is multicolor 3D printing important?
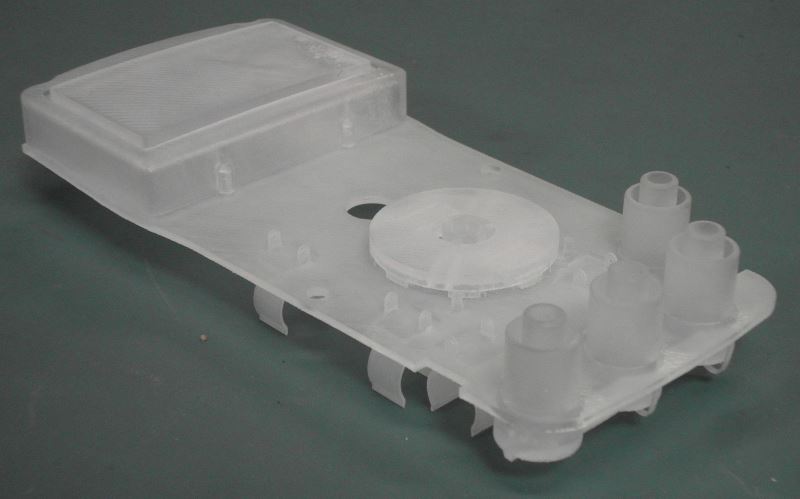
Stereolithography was used to create this single-color prototype of a circuit board. Image created by Binarysequence.
To date, the primary use of 3D printing has been to create prototypes for parts and products. Later, they go on to be produced using more conventional manufacturing techniques. These physical models are important, as they provide information that a simulation cannot replace.
However, most physical objects contain multiple colors and materials. This makes the most widespread forms of 3D printing inadequate for the purpose of producing them. It also means that the prototyping process requires additional steps—expanding timescales and increasing expense.
Printing in multiple colors is a further step towards creating usable parts and products. It makes the printing process more efficient, and allows for more detailed models. Coloring the model during production also helps reduce the number of necessary post-processing steps, increasing cost efficiency.
In recent years, new techniques have arisen to allow for the production of multicolor 3D-printed objects. Many of these techniques are not yet widespread; others have a price point too high to attract desktop users. However, they show signs that multicolor 3D printing is finally becoming a reality.
Printing objects separately
The first option involves simply breaking a single CAD model into individual components based on color. This requires a significant amount of pre-processing, which must be precise to ensure a smooth, well-defined finish.
There are advantages and drawbacks to this method. On the positive side, if there is a fault with any individual part of the model, this can be reprinted separately to the rest of the model. Additionally, it avoids the issues that can arise when trying to print using multiple materials, whereby waste filament can end up getting stuck to the model.
Perhaps the biggest advantage to this method is that it is also accessible to desktop users, as it requires only a single extruder. This allows you to create multi-colored models without breaking the bank. Meanwhile, some other methods require much more complex 3D printing technologies, with the hardware involved costing six-figure sums.
Nonetheless, there are definitely still downsides to this simple method. Firstly, this method involves perhaps the greatest amount of work prior to printing, as you’ll need to ‘break up’ your model into its component colors in CAD software. Your work doesn’t stop there: when using this method, you have to post-process each individual part before assembling the model as a whole. In addition, it is practically impossible to achieve smooth color gradients using this technique.
Still, if you’re on a tight budget and still want to print using multiple colors, this option could be your best bet.
Pausing mid-print
This method works using similar logic to the first, in that it involves using multiple colors and only a single extruder. However, it involves a lesser degree of pre-processing, and ends up producing a single model rather than a number of parts.
With this method, you simply need to pause the printing process midway through and change the filament feeding into the extruder. As a result, you definitely need to have a keen eye when using this method, as you’ll usually need to manually pause the printing process. You’ll also need to ensure a smooth changeover of filament, with no remnants of the previous color, as this could negatively affect your print quality.
A further consideration is that, while you can print in multiple colors using this method, you can only do so in layers. This makes this a perfect method if your colors appear in layers, but unsuitable for other kinds of multicolored 3D printing.
To see this type of printing in action, check out this video from Prusa Printers. (They’ve even worked out a solution that automatically pauses the print when you need to change colors!)
Printing with multiple nozzles
It’s fair to say that the first two solutions listed here are somewhat low-tech. The next one takes things a step further by adding multiple extruders into the process.
Much like a standard desktop 3D printer, these machines employ fused deposition modeling techniques to form models. The key difference is that instead of using a single nozzle, they use separate nozzles for each spool of filament. Models typically include somewhere between two and five nozzles, and are able to print in as many colors as there are available nozzles.
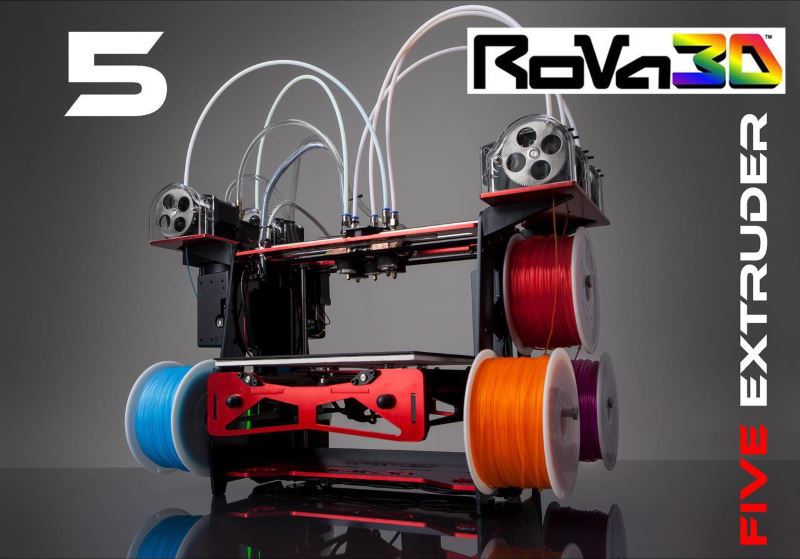
ORD Solutions’ Rova3D machine is just one example of a 3D printer that prints in multiple colors using several nozzles
Using this technique means that the quality of your print is in your machine’s hands. There are positives to this method: rather than manually changing spools of filament, or dealing with post-processing and assembly, G code commands control each color change.
However, there are drawbacks to the multi-nozzle technique. As using more nozzles means using more space, the area of your machine available for printing shrinks. Next, you are likely to experience frequent issues when it comes to the calibration of your nozzles on all three axes.
There is also the problem of what happens with the remaining nozzles while one is printing. In an ideal world, each filament would start and stop perfectly smoothly. In the real world, this is not the case, and the other nozzles may continue to ooze filament as another is printing. Worse still, the different materials may fail to properly adhere to one another, creating an unstable model. Furthermore, this method is similarly unsuitable for creating color transitions or gradients.
One nozzle with multiple spools of filament
A further technique builds on the idea of multiple spools of filament, but eschews the multi-nozzle method. Instead, some hardware companies have created machines which feed multiple spools into a single nozzle.
The advantages are similar to the “classic” multi-nozzle technique, but with a few additions. Firstly, as this method uses only one nozzle, the printable area does not shrink. Secondly, there are no calibration issues to worry about. Finally, machines employing this method typically account for the need to change colors by printing a “waste tower” away from the main model. Check out this video from Prusa Printers to see an example:
This method is therefore a great way to ensure good results on a smaller budget. (Some enthusiasts have even created their own versions—check out this tutorial from RepRap for an example!) However, it still does not solve the issue of printing models with color transitions, and still does not offer true full color printing.
Non-extrusion-based methods
The final method moves away from the familiar FDM 3D printing technique entirely. In fact, it works in a manner closer to a traditional 2D inkjet printer.
The technique works by laying down thin layers of sandstone powder (offered by Shapeways) or liquid plastic (as in Stratasys‘ PolyJet technology).
In full-color sandstone printing, the machines also include CMYK printheads, which apply color to each layer during the printing process. Meanwhile, the machines also bind the layers together, building up a complete model.
If using PolyJet printing, then a liquid photopolymer is used instead. This material is reactive to UV light. The machine UV-cures the photopolymer during the printing process, and layers of this plastic build up to form a model. During this process, removable support pieces may also be printed, which can then be removed later.
The advantages of using these techniques are clear: you can produce full-color models, with the possibility for color gradients, and with minimal post-processing. As you can see in the below video from Stratasys, the results can be stunning:
So, what’s the downside? The primary issue here is the cost: true color 3D printers typically start from around $200,000. Unless you happen to be sitting on a particularly large pile of cash, these machines are simply out of reach of most desktop users.
Services such as i.materialise enable users to order individual pieces, meaning that if you’re looking for a one-off model, then you’re in luck. Unfortunately, if you’re looking for an affordable, true color 3D printing solution that you can use at home, then you’ll need to wait a while yet.
Want to hear more about the latest developments from the 3D printing industry, CAD, and beyond? Check out our news section. Alternatively, if you’re looking to create 3D models of your own to print, take a look at Scan2CAD’s top CAD freeware here.
