
Many of us will agree that manual data extraction is far from accurate, convenient, and appealing. In fact, it can often lead to errors if utilized to extract data from large data sets or even complicated engineering drawings. It can also negatively impact productivity by requiring you to use up an unnecessary amount of resources to extract the data or locate errors. Enter automated data collection, under which AutoCAD data extraction falls. It guarantees savings in time and promotes productivity and accuracy. It also reduces costly errors that might arise from manually entering data.
The data extraction tool in AutoCAD simplifies whole processes, such as the creation of material schedules and bills of materials. This is because the data can be automatically extracted from the drawings and exported into third-party applications. This comes in handy for drawings with an inordinate number of blocks and geometric objects. In this complete guide to the AutoCAD data extraction feature, we will define what the feature is and how to use it. We will also discuss how to update and edit existing data extraction tables. Let’s get started.
Table of Contents
What is AutoCAD Data Extraction
Initiated using the DATAEXTRACTION command, which is abbreviated as DX, AutoCAD data extraction is a feature that extracts data from one or more drawings and fills it into a table. It can also be used to merge data from an external file, with the software filling this data into a table. In addition, depending on your chosen settings, this feature can export the data to an external .csv, .xls, .mdb, or .txt file. To put it simply, the AutoCAD data extraction feature exports drawing information, block attributes, and object properties to a data extraction table or external file.
The AutoCAD data extraction feature offers the following benefits:
- The feature saves time by simplifying the data collection process
- It reduces costly errors borne from the manual data entry
- AutoCAD data extraction automatically counts items that conform to specific criteria
- It allows you to import data from external files and merge them into your drawing
- The feature allows you to automatically change the contents of the data extraction table every time you change the design
Now, let us look at how you can initiate a new data extraction exercise in AutoCAD.
How to Create a New Data Extraction in AutoCAD
Step 1: Type the AutoCAD Data extraction command
Type DX or DATAEXTRACTION on the command line and press Enter. This command will open the Data Extraction wizard, consisting of eight windows.
Step 2: Create a new data extraction
On Page 1 of the wizard, choose the Create a new data extraction option and click Next. Then, specify the location on your computer where you want the extracted data to be saved and the file’s name.
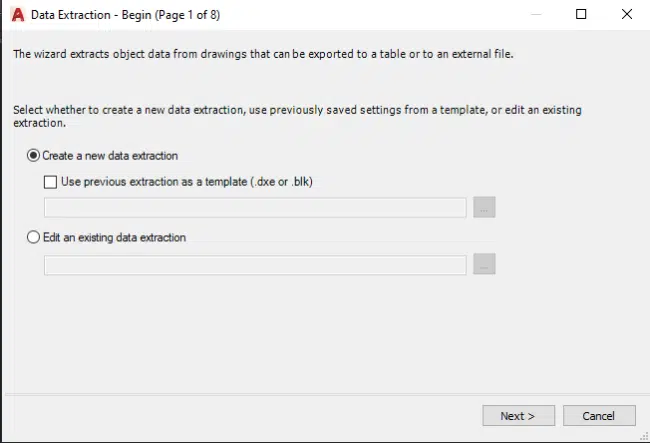
Figure 1: Data Extraction Wizard’s Begin Page
The file will have a .dxe extension. (This extension represents an AutoCAD file containing properties or elements that are extracted from existing drawings.) Upon clicking Save, AutoCAD will open Page 2 of the wizard.
Step 3: Define the source of the extracted data
On Page 2, you have two options: Drawings/Sheet Set and Select objects in the current drawing. The first option will extract data from all the objects in the drawing; always ensure you have checked the Include current drawing box. On the other hand, the second option will prompt AutoCAD to select data from the objects you will have chosen. The second page of the wizard also allows you to Add Drawings. This means you can use the AutoCAD data extraction feature to simultaneously extract data from more than one drawing. Moreover, if you want to add multiple drawings from the same folder, click the Add Folder option.
Note that you can customize the data extraction process by clicking on the Settings option, which will open the Additional Settings dialog box below. However, we recommend that you leave these settings unchanged.
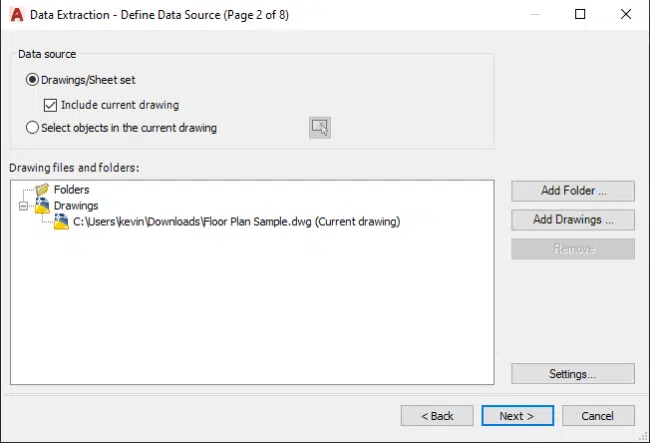
Figure 2: Data Extraction Wizard’s Define Data Page
Click Next to continue to Page 3.
Step 4: Filter the objects from which you want to extract data
Page 3 of the wizard allows you to select the objects from which you want to extract data. You can do so by checking the Display all object types, Display objects currently in use only, or Display blocks with attributes only option. We will touch on the role of the Display blocks with attributes only below. For now, only tick the first two options. Do note that you can choose whether to display blocks or non-blocks. To do this, simply uncheck the Display all object types. This lets you check the Display blocks only or Display non-blocks only.
You can also filter out objects whose data you do not wish to extract. To do this, simply locate the row containing the object within the table and uncheck its box. This box is located in the row’s first cell.
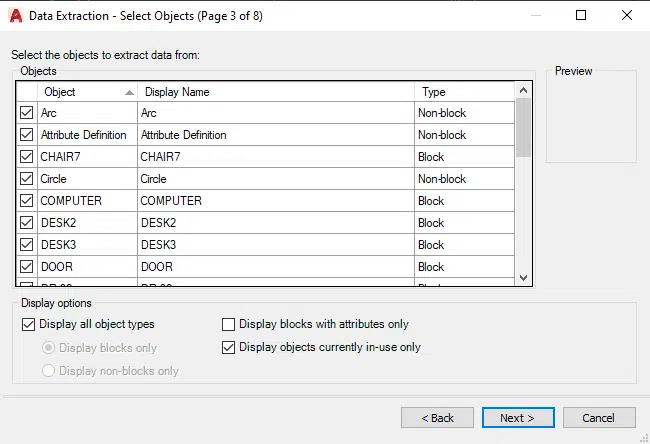
Figure 3: Data Extraction Wizard’s Select Objects Page
Click Next to proceed to Page 4 of the wizard.
Step 5: Select Object Properties
On the Select Properties dialog box (Page 4 of the wizard), select the properties you want AutoCAD to consider while executing the data extraction. (Note that these properties are based on the objects selected in step 4.) To do this, check or uncheck the boxes in the first column corresponding to the property you want to include or disregard, respectively. Click Next.
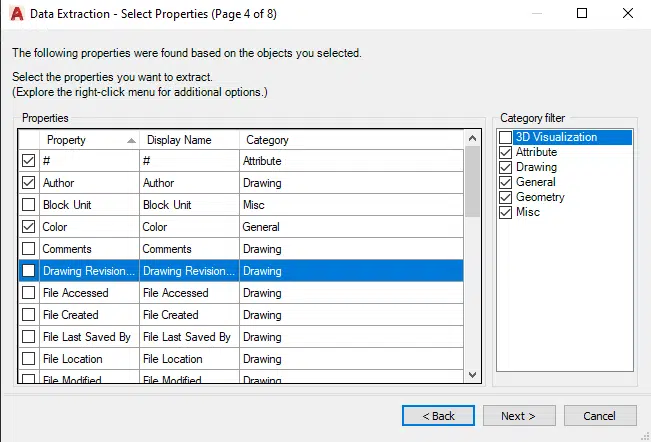
Figure 4: Data Extraction Wizard’s Select Properties Page
If AutoCAD displays the Non-Uniformly Scaled Blocks window, simply click OK.
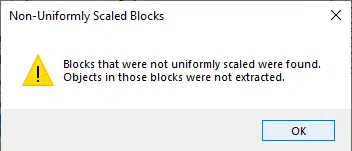
Figure 5: Non-Uniformly Scaled Blocks Window in AutoCAD
Step 6: Refine the contents of the table
Page 5 of the wizard allows you to reorder the columns, sort the data based on your preferred criteria, filter results, link external data, and more. For instance, you can hide or rename columns. You can also preview the table by clicking the Full Preview button.
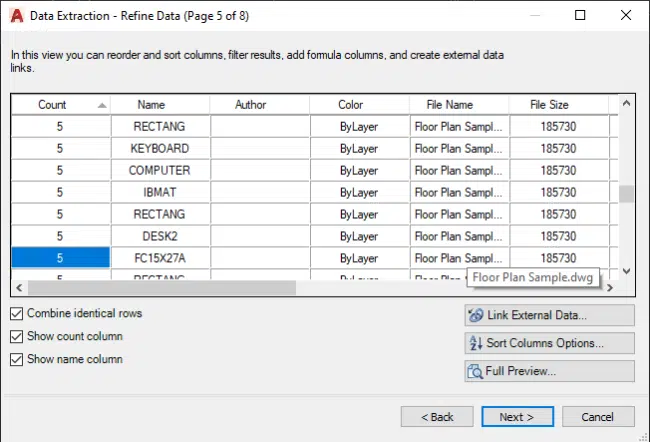
Figure 6: Data Extraction Wizard’s Refine Data Page
Click Next if you are satisfied with the contents of the table.
Step 7: Choose the output option
On Page 6 of the wizard, choose whether to insert the data extraction table into the drawing, output the data to an external file, or both. If you elect to export the data to an external file, specify the filename and file extension (you can save the file as a .xls, .csv, .mdb, or .txt file).
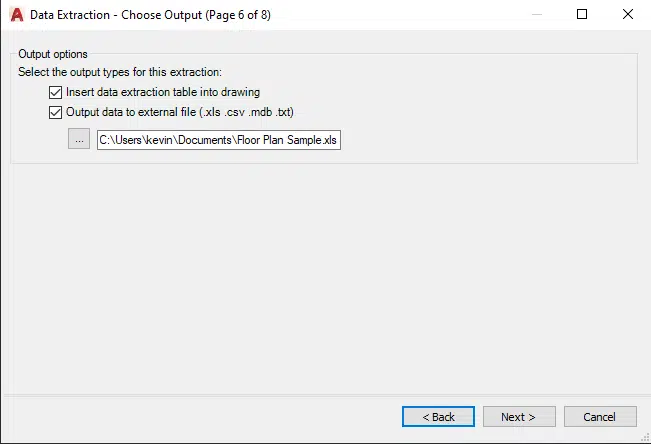
Figure 7: Data Extraction Wizard’s Choose Output Page
Click Next to continue.
Step 8: Specify or modify the table style
Page 7 of the wizard allows you to change the properties of the table. For instance, you can modify the text alignment, color, height, and style. You can also change the table’s fill color and the line weight of its borders. Additionally, you can enter a title for the table and set the title and header cell style.
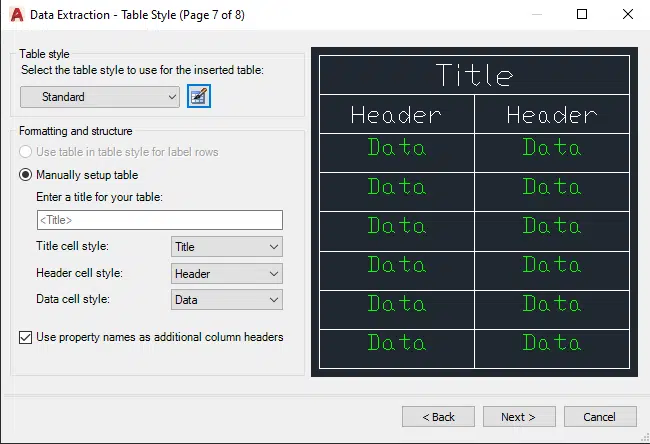
Figure 8: Data Extraction Wizard’s Table Style Page
If you are satisfied with the attributes of the table, click Next.
Step 9: Complete the data extraction process
Complete the extraction by clicking Finish on the wizard’s last page (Page 8). You must also specify the insertion point of the table. And as you will observe, the table is inserted as a tiny object in the drawing. Therefore, you must scale the table appropriately using the Scale button on the Modify ribbon panel within the Home ribbon tab. For more on how to scale objects, refer to our complete guide on scaling in AutoCAD.
How to Edit an Existing Data Extraction in AutoCAD
In addition to creating a new table from a data extraction exercise, AutoCAD allows you to edit an existing table. This means that you can modify the properties of the table, e.g., the table style and the columns to be displayed. For instance, you can edit a table such that it now shows columns that were previously hidden.
To edit an existing data extraction operation, follow some of the steps described above. However, instead of selecting the Create a new data extraction option as was described in step 2, choose the edit an existing data extraction option. (See figure 2 above.) Next, follow the subsequent steps as described above.
How to Update an Existing Data Extraction Table
AutoCAD also allows you to update an existing data extraction table without using the Data Extraction wizard. For instance, if you have updated the drawing by including new blocks or geometric objects, you can update the table to reflect these changes. To do this, follow the steps below:
- Left-click on the existing data extraction table to highlight it
Below is an image showing a highlighted data extraction table

Figure 9: Example of a highlighted data extraction table
- Next, right-click any section within the table, and on the menu that pops up, click on Update Table Data Links
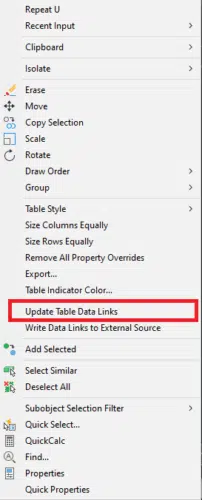
Figure 10: Menu showing Update Table Data Links option
- AutoCAD will automatically update the table
How to Extract Block Attributes in AutoCAD
Block attributes or attribute definitions refer to values such as product names, ratings, part numbers, or item costs that provide more information about a particular block. Examples of block attributes in CAD drawings include door and window labels, blocks that represent locations such as conference tables, office furniture, and so on, and title blocks. Generally, these block attributes can be extracted into a .csv file, which can then be imported into another program, or a table object that can be inserted into a drawing. In fact, you can use the extracted data to create bills of materials or material schedules.
It is worth pointing out that there are two ways of extracting block attributes in AutoCAD: the ATTEXT or -ATTEXT command and the DATAEXTRACTION command. The ATTEXT command extracts attribute data and saves it as informational text, with the data separated by commas (as in comma-delimited files) or spaces (as in space-delimited files). This approach is cumbersome as you also have to create an attribute extraction template file. But given that this article focuses on extracting block attributes as table entries, we will concentrate on the DATAEXTRACTION command.
How to Extract Block Attributes using AutoCAD Data Extraction Command
To extract block attributes in AutoCAD, follow the steps below:
- Type DATAEXTRACTION or DX and press enter
- Create a new data extraction and click Next
- Specify the source of the extracted data and click Next
- Uncheck the Display all object types option and select the Display blocks only option. Also, ensure you select the Display blocks with attributes only box. Then click Next.
- On the Category filter section of Page 4 of the Data Extraction wizard, check only the Attribute box, leaving all the other filters unchecked. Finally, click Next
- On the Refine Data page, Refine the table by reordering, renaming, or hiding the columns and click Next to continue.
- Check the Insert data extraction table into drawing option if you want to prompt AutoCAD to insert the drawing into your existing table. If you want to eventually import the table into another application, ensure you have checked the Output data to external file option. Finally, click Next.
- Modify the appearance and style of the table on the Table Style page and click Next
- Click Finish to complete the data extraction
- Specify the insertion point, at which point AutoCAD will insert the table
- Scale the table accordingly
Conclusion
The AutoCAD data extraction feature is a powerful tool that helps you save time and increases productivity, while also enabling you to avoid costly human errors that may arise from manually extracting data from complex drawings. In this complete guide to the AutoCAD data extraction feature, we have explored how to use the DATAEXTRACTION or DX command to initiate a new data collection exercise. We have also discussed how to update and edit existing data extraction tables.
