PNG is by far one of the most common file types available. While most prominent in the field of web graphics, this particular file type spans across a wide range of industries and users. If you’re working in sectors that require the utmost precision, however, PNG is far from ideal. So, what can you do to assure accuracy? The simplest solution would be to convert PNG to vector—giving you the ability to share files easily, use them in CAD and much more.
The question then, is how exactly do you convert PNG to vector for accurate results? Scan2CAD, as usual, is way ahead of you. We’ve put together the ultimate guide on how to convert PNG to vector—looking at vector file types, how conversion works and even giving users a free Scan2CAD download to do it all!
Table of Contents
- Basics 101
- PNG
- Vector files
- Conversion: the ultimate lowdown
- Conversion methods: which is best for me?
- Convert PNG to vector with Scan2CAD
Basics 101
So, you’re looking to convert PNG to vector accurately—but where do you start? Before we get stuck into the ins and outs of the actual conversion process—and how you can do it for free with Scan2CAD—we’re going to look at why conversion is necessary in the first place. It all leads back to the type of images you’re working with—i.e., rasters and vectors.
Rasters and vectors
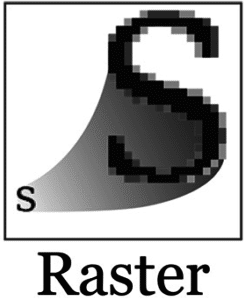 Let’s start with raster images. Did you know that most of the digital images you see—from photographs to the funny GIFs you send to your friends—are in fact raster images? With wide support from web browsers, raster images are incredibly easy to share and ideal for uses like photography.
On a more technical note, rasters are built up entirely of pixels. The advantage to this means that they can hold millions of colors, which is why they’re so great for photography. A disadvantage, however, is that they’re resolution dependent. What does this mean? You can’t resize or rescale a raster image without it becoming blurred. Additionally, if you’re looking to edit your PNG, you’ll end up having to edit the entire image as you can’t do so to individual pixels. For industries requiring accuracy, this can be very problematic.
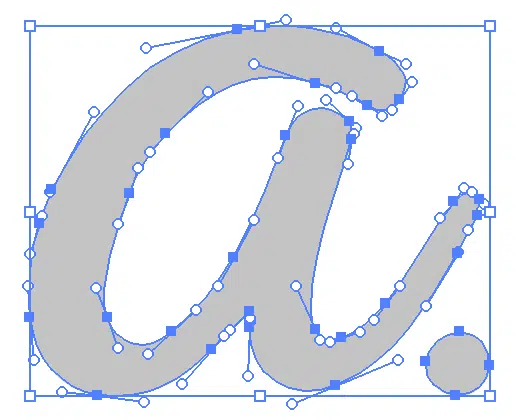
 And now onto vectors. There’s a reason that so many designers and engineers prefer to use vector images instead of raster images, and that’s because they can come with an abundance of benefits and can be used in CAD software.
So, what makes vectors so different from rasters? To put it simply, they store image data in a completely different way. Vectors aren’t made up of pixels—they’re made up of paths and display the individual elements of an image. These elements include lines, curves, shapes and text. With each object in a vector being defined by mathematical coordinates, you can change the scale without affecting the resolution whatsoever. This means a single vector image can now have a wide range of uses.
If that wasn’t enough, you can actually make edits to the individual elements within a vector image. And if you’re working with them in CAD software, you can take elements you like and reuse them in a new drawing—negating the need to re-draw plans or designs. It’s also possible to attach data to specific elements when working in CAD—specifying materials, sizes and dimensions.
Why we need to convert
To summarize, we need to convert PNG to vector when…
- We need to scale an image. With rasters being resolution dependent, we can’t resize them successfully—problematic if you want to use an image in different situations. Using a vector means you don’t have to worry about any loss in quality.
- To edit a drawing. When you try to edit a raster image, you end up “painting” over the entire thing, because you can’t identify individual elements. This is the opposite to vectors which enable a wide range of editing capabilities.
- For sharing. If you’re working in design or engineering industries, vector images are easy to share with colleagues, collaborators and clients.
PNG
![]()
This particular file type supports lossless compression—meaning it does not lose quality during the editing process. PNG also has alpha layers which allows for transparency within the image. While not as high-quality as Scan2CAD’s recommended file format TIFF, PNG is a good format to use for vectorization. You should be aware, however, that PNGs can have large file sizes due to the lossless compression.
Vector files
If you’re looking to convert PNG to vector with accurate results, you’re looking at converting to one of two main vector file types: DWG or DXF. If you’re a Scan2CAD regular or someone who works with CAD software, it’s unlikely that you’ve never come across the DWG or DXF file format before. For the uninitiated out there, however, we’re going to go through a quick lowdown.
DWG
![]()
DWG—DraWinG—is the native file format for one of the most popular CAD software packages out there: AutoCAD. It was created in 1982 and subsequently licensed by Autodesk. It didn’t take long for the file type to take off—Autodesk estimates that there were at least 2 billion DWG file types in circulation by 1998!
The DWG file format is predominantly used in AutoCAD. As the software updates, so too does the DWG file format—coinciding with new releases of AutoCAD. Due to this connection to AutoCAD, it’s not surprising to find that DWG supports entities specific to the software—not least of which are dynamic blocks.
As a proprietary file format, software developers need to get a specific licence to be able to use the DWG format in their own software. Due to this, you’ll find the occasional CAD software package that doesn’t support the file format. Fortunately, there are many ways to view DWG files without AutoCAD if you’re collaborating or sharing with other people.
DXF
![]()
This universality of the DXF file format is why we view it as a “gold standard” of sorts. It’s the easiest file format to use when you’re working with CAD, because you don’t have to worry about whether the people you’re sharing files with have the right software or not. Almost all CAD software packages support the format, which is why it’s our recommended file format for vectorization.
Which one should I use?
It all really comes down to the CAD software you’re using and whether you’re sharing your files with anyone. If you’re an AutoCAD user, then you’ll want to convert PNG to DWG. If you’re sharing files with people who don’t use AutoCAD, your best bet is to convert PNG to DXF instead.

Conversion: the lowdown
So, you know all about PNG and you’ve decided which vector file type you want to convert to—what’s next? Understanding how conversion works. This process is often known by another name: vectorization. If you want to convert PNG to vector, you’re looking at either manual or automatic tracing.
Manual and automatic tracing
Automatic tracing, by comparison, uses software that takes the entire process out of your hands. All you have to do is open up your image in your chosen software, choose your presets and at the click of a button, your PNG will be converted.
Which gives me accurate results?
Manual tracing has the advantage of human understanding behind it. That is, if you’re working with an old drawing, you’re able to figure out where the lines are even if they’re faded. In that sense, manual tracing can give you accuracy if you’re working with dated, hard-copy designs. Automatic tracing can vary in regards to accuracy—dependent on the software you’re using. If you’re working with the right software, you’ll be able to take advantage of image settings and OCR technology—though you won’t get the benefit of human understanding.
So, choose manual tracing if you’re working with old drawings and if you have enough time to dedicate to the project—it can be quite time-consuming after all! Alternatively, choose automatic tracing if you need a quick process—make sure you’re using the right software to get accurate results. If you’re not sure where to start, don’t worry—the section below will talk you through the methods of conversion which will give you the most accurate results.
Conversion methods: which is best for me?
Online converters
We’ll make it simple: if you’re looking to convert PNG to vector and get accurate results, there’s no use in using online converters. No matter which one you come across—and how much it promises to give accurate results—you’ll only get a poor output and a wide variety of problems.
What problems could there possibly be, you ask? Online converters often come with:
- File size limitations
- Issues with converting text
- Limited number of conversions
- Overall limited capabilities
One of the most obvious setbacks to online converters, however, has to be security risks. Once you’ve converted your image online, you have to download it to use it. When you do, there’s no telling what else you’re downloading. There’s no point in putting your entire system at risk for a poor output.
Image editing software
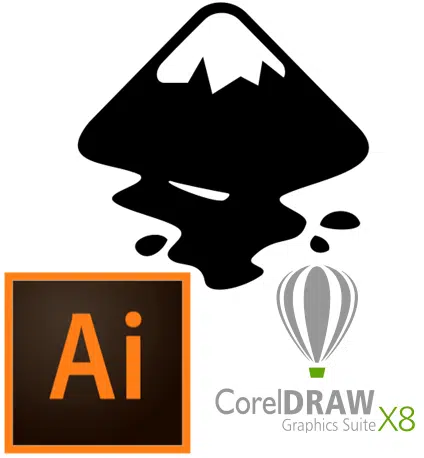
Depending on your chosen software package, you could either manually trace or automatically convert. Manual tracing in image editors works in the same way we described earlier: you open your image in the software and trace over it with vector entities. Similarly, when tracing automatically, you’ll select some presets and at the click of a button or two, you’ll have converted your PNG. We’ve previously talked you through doing this in a variety of software packages, including:
Image editors can be effective to use for conversion—particularly if you’re converting simple images like logos or graphics. If you’re looking to convert technical drawings like architectural designs, for example, you won’t be able to get away with an accurate result from an image editor. While some editors come with advanced conversion presets, for the most part, they don’t offer a sufficiently specialized conversion.
Scan2CAD
There’s one reason you’ve made your way through this entire guide and that’s because you want to convert PNG to vector accurately. As we’ve discussed, however, online converters and image editors won’t do this for you. We offer a simple solution to this problem: Scan2CAD.
As a market-leading raster-to-vector conversion software—specializing in technical drawings—offering accurate results, you won’t find a better solution than Scan2CAD. It doesn’t matter if you’re converting architectural plans or dated hard-copy designs—Scan2CAD gives you a range of vectorization settings designed to make sure your conversion is catering to your exact drawing.
Interested? Check out the section below to see how you can convert PNG to vector with Scan2CAD for accurate results…
Convert PNG to vector with Scan2CAD—for accurate results
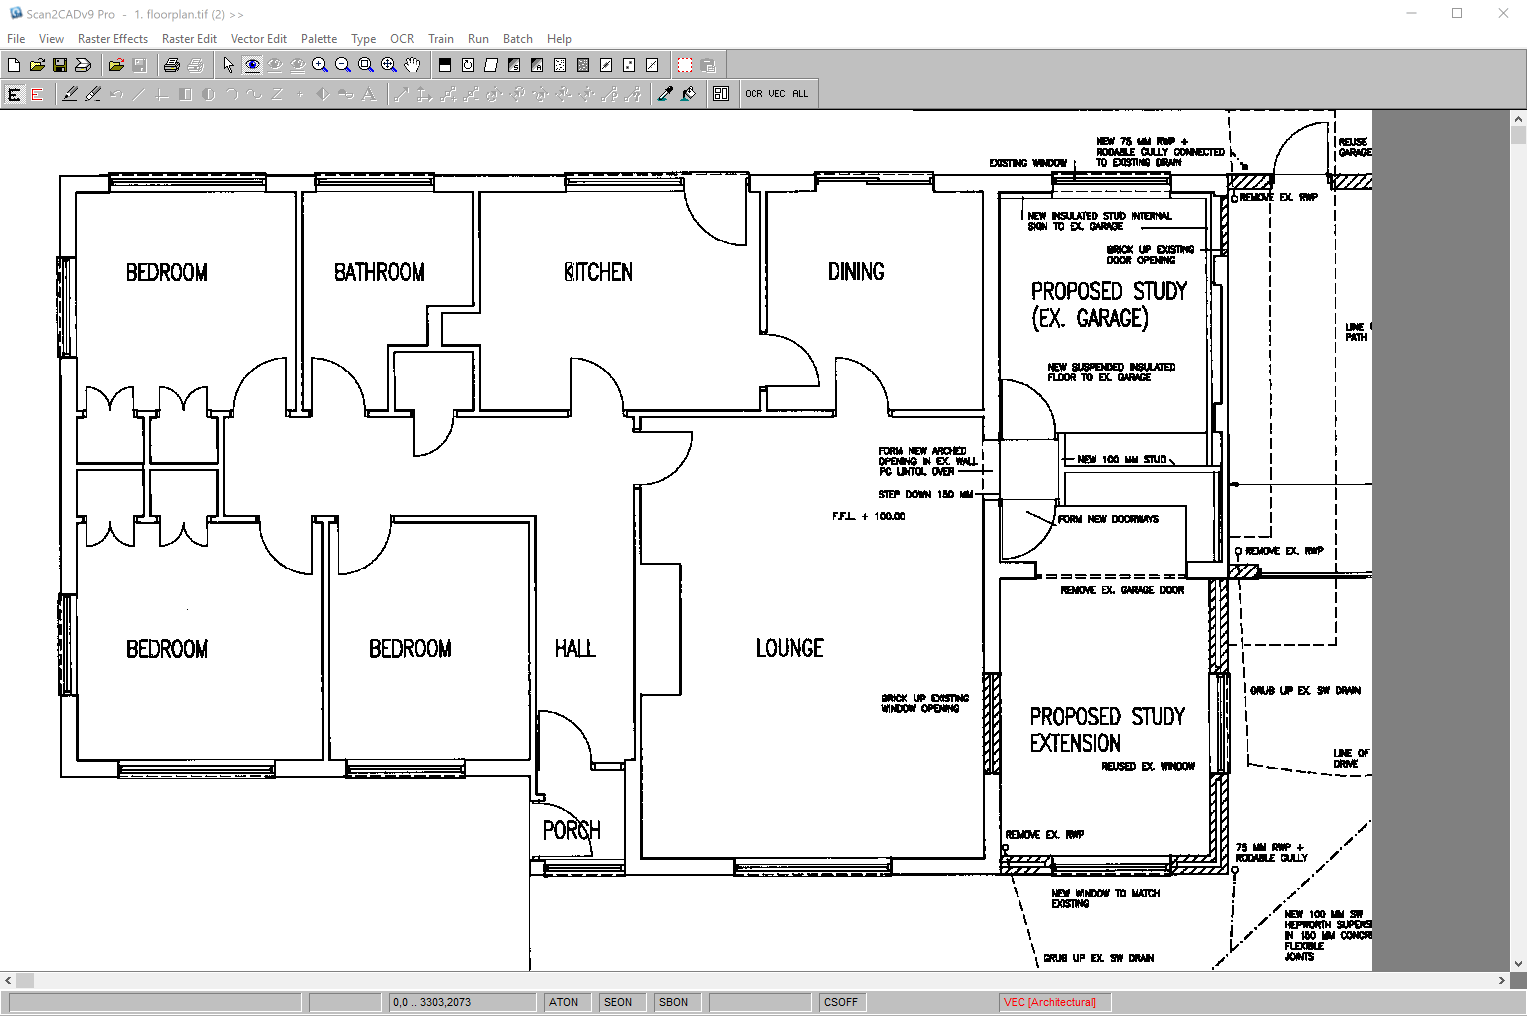
Converting a technical drawing to vector with Scan2CAD
How does it work?
Scan2CAD works by automatically detecting any lines, curves or text present in your PNG. It then traces over them with vector lines and text. All you’ve got to do is pick the right vectorization settings. These settings exist because Scan2CAD knows that different drawings require different conversion methods, e.g., architectural maps versus contour maps.
Picking the right image…
As we mentioned earlier, as an automatic process, there is a lack of human understanding. As such, you need to make sure the PNG you’re converting is simple, clear and preferably monochrome. Why exactly? If you’re looking to convert full-color photographs, you won’t get an accurate result because the software won’t be able to differentiate between the different colors.
Not only should you avoid colorful images—sticking to black and white—when converting, you should also make sure your PNG doesn’t contain:
- Blurred areas
- Overlapping elements
- Pixelation
There’s no use in trying to convert a substandard image using Scan2CAD—you won’t be able to get an accurate output. If you avoid common raster issues—as seen in the image below—you’ll be able to get an accurate result when you convert PNG to vector using Scan2CAD.
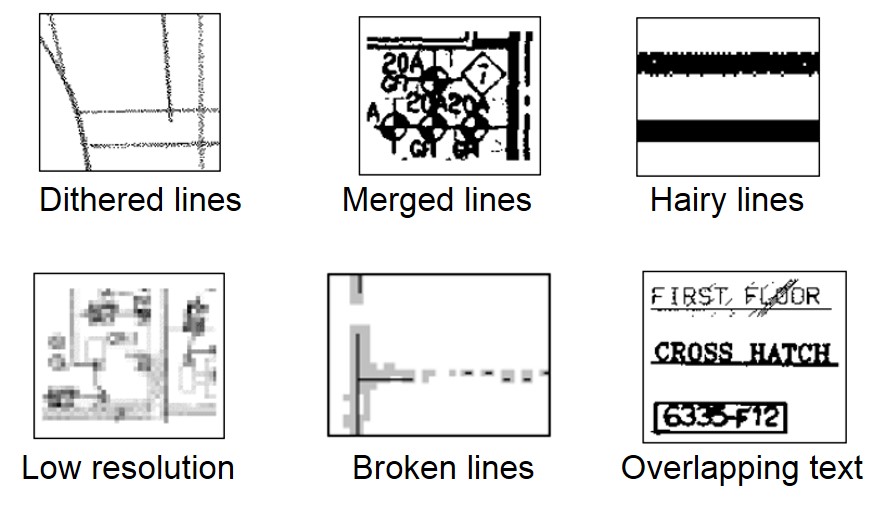
Don’t bother converting any raster image that sports any of these problems…
Getting it just right…
Even after picking the perfect PNG to convert, you’ve still got a little bit of work ahead of you to ensure you get the most accurate result using Scan2CAD. Once you’ve got your raster picked out, you can take advantage of Scan2CAD’s market-leading editing tools to get it just right…
- Thresholding is key! Remember how we said to stick to black and white images? The Thresholding tool enables you to turn your PNG into strictly black and white pixels—choosing a point at which shades of grey are classed as black or white. This can be applied to specific parts of your image (adaptive) or the entire PNG (simple).
- Avoid speckles or holes. Using Scan2CAD’s remove speckles/holes tool, you can fill in all those stray pixels or gaps. This will prevent the software from picking up these pixels and assuming they’re part of the drawing—ensuring your image has only solid objects.
- Thicken those lines. Gaps and broken lines in a drawing can severely impact your chances of getting an accurate result—something that is crucial in technical drawings. With the thicken lines tool, you can fill in the gaps quickly and efficiently.
- Give it a smooth finish! You can end the editing process with the easiest tool of them all: smooth. As the name suggests, this particular tool gives your drawing a nice and smooth finish—getting rid of those pesky hairy edges!
And off you go!
Once you’ve finished with the editing process, you can get started and convert PNG to vector with Scan2CAD. It really couldn’t be any easier. All you’ve got to do—once you’ve opened your PNG and edited it—is pick the vectorization setting relevant to your drawing and select the vectorize option.
Are you looking to convert other raster file types to vector, such as BMP? This guide discusses BMP to vector conversion.