
Before discussing how to import floor plans to Revit, let’s first understand what this versatile software developed and sold by software juggernaut Autodesk entails. Revit is a popular software designed for and used by construction professionals such as architects, designers, structural engineers, and mechanical, electrical, and plumbing (MEP) professionals. It is mainly used as a Business Information Modeling (BIM) software. In this regard, it enables these professionals to manage designs and information on construction projects throughout their lifecycle.
Revit enables users to create parametrically (3D) models, generate documentation, view and annotate elements of the 3D model in 2D, and edit the designs. Notably, the software automatically updates all existing versions once you edit the design. It also provides specialized tools for different professionals, a characteristic that has given it a lead in the BIM space. In fact, and according to a 2020 survey by UK-based NBS’s 10th Annual BIM Report, Revit holds a 50% market share, beating the likes of Graphisoft’s ArchiCAD (16%), AutoCAD (13%), and Vectorworks (4%).

Five Commonly Used Design Tools (source)
Despite all its features and industry-leading capabilities that have endeared it to half of BIM software users, Revit falls short as regards importing raster drawings. Indeed, it lets you import floor plans to Revit but does not allow you to manipulate this drawing as-is unless you first manually trace over the outline. But this is a time-consuming exercise plagued with issues such as inaccuracies.
For these reasons, it is more convenient to convert the raster drawing to a vector format before you can import the floor plan to Revit. And this article focuses on exactly this: how to import floor plans to Revit using Scan2CAD. But first, what makes Revit stand out in a sea of numerous competing products?
Table of Contents
About Autodesk Revit
Revit was initially launched in 2000 by Massachusetts, United States-headquartered Charles River Software (CRS), a development company founded in 1997. CRS was later renamed Revit Technology Corporation in 2000 and subsequently acquired by Autodesk two years later.
The acquisition, completed for a cash-based consideration of $133 million (about $210.1 million presently, adjusted for inflation), helped Autodesk reach new customers as well as expand its building industry business. At the time, the then company CEO and Chairman Carol Bartz commented that Revit would offer the best drafting and model-based design capabilities on the market. Indeed, Carol’s prediction has been fulfilled, with the software commanding an unbeatable lead in the BIM space.
Revit is now part of a family of powerful software under the Autodesk umbrella. These applications fall into different categories, including computer-aided design (CAD), computer-aided manufacturing (CAM), BIM, computer-aided engineering (CAE), and computer graphics.
Revit Features
This lead is pegged on a number of elements, according to user reviews. First, Revit offers design collaboration among different professional disciplines. It is also user-friendly, easy to learn/adapt, and provides a myriad of dependable modeling tools. From a features perspective, Revit offers the following powerful 3D modeling and 2D design tools and capabilities:
- Visualization and rendering
- Annotation
- Parametric elements such as windows, doors, and walls
- Architectural and structural steel modeling
- Ability to produce design alternatives depending on your objectives and constraints
- Interoperability with commonly used CAD formats
- Form-making (creating a site-specific profile, form, and sketch studies), and more
Revit also promotes collaboration by supporting:
- Scheduling with the use of tables
- Worksharing, which automatically saves, syncs, and updates any changes, creating an up-to-date centrally shared model
- Cloud rendering
And as stated earlier, Revit also offers discipline-specific features and capabilities for architects, structural engineers, MEP professionals, designers (computational design users), and construction professionals. In addition, Revit also lets you import raster files such as PDFs and images, but with a caveat.
Revit Shortcomings
A drawing saved as a raster file and subsequently imported into Revit only serves two functions. First, it is meant to enable you to trace over the outline of the drawing. Second, you can also use it as a reference to create a 3D model.
This means that Revit does not support vectorization, a process that automatically traces over a raster drawing’s outline to create a vector drawing. To accomplish this, you either have to manually trace over the outline, which, as stated, is highly time-consuming and may introduce inaccuracies and inconsistencies.
Alternatively, you can use vectorization software such as Scan2CAD. A leading conversion software, Scan2CAD enables you to convert the raster file (PDF or image) into a vector format that you can then import into and edit on Revit. This means that once the vectorization and importation are complete, you can directly manipulate the drawing using Revit. You no longer have to trace over the outline manually or use it as a reference.
In this regard, Scan2CAD promotes convenience and accuracy. And in fact, it also lets you import images into Revit. In this article, however, we’ll specifically focus on how to import floor plans to Revit. In particular, we will highlight the steps on how to convert the raster floor plan to a vector format before you can import it to Revit. So, let’s get into it.
How to Import Floor Plans to Revit
As a reliable intermediary, Scan2CAD offers features and capabilities that Revit does not provide. Most notably, it enables you to clean a raster drawing and subsequently vectorize it. Simply put, Scan2CAD facilitates any effort to import floor plans to Revit. And here’s how it achieves this feat.
Video Tutorial: How to Import Floor Plans to Revit
Step-by-Step Guide: How to Import Floor Plans to Revit
- Launch Scan2CAD and import the raster floor plan you intend to vectorize. Scan2CAD opens the drawing regardless of whether it is saved as a PDF or image. It is worth noting that you can verify the characteristics of the raster drawing by simply zooming in on a section of the floor plan. For example, if you observe that the lines comprise pixels, then you are dealing with a raster floor plan. In this case, the quality of the lines will deteriorate the more you zoom in on the drawing.
- Next, click the Clean raster image button. On the resultant pop-up window, you can make a few changes depending on the quality of your raster drawing. For instance, if Scan2CAD has not already grayed out the Threshold black & white text, that means your drawing is not in black and white. In this regard, check the box to convert the lines and text therein to black and white. You can also play around with the threshold scale. Scan2CAD also lets you Remove speckles & holes, Thicken lines, or Smooth. Finally, and when satisfied with the changes, click OK.
- Click the Convert raster image button, which prompts a Convert Raster Image window to be displayed. This window lets you choose the appropriate vectorization preset as well as the vectorization option. Regarding the latter, you can select Vectorize, OCR, or Vectorize and OCR. If your drawing only contains geometric objects, choose the first option. But if it features both geometric and text-based objects, go with the last option. Selecting Vectorize and OCR creates a new OCR tab that allows you to set the maximum character size as well as include settings that best fit your drawing. For instance, if your floor plan has either vertically or angularly oriented text, this tab enables you to toggle these options accordingly. Once you are done with selecting the suitable options, click on Run.
- Scan2CAD will generate a vector preview of the vector floor plan with which you can make the necessary changes. Finally, click OK.
- The next step entails saving the converted drawing. To accomplish this, simply click on Export and, on the resultant window, input the file name and select the desired file format. Then, click Save.
- On the resultant DXF/DWG Export Options window, ensure the Convert black vectors to the white box is unselected. This is because Revit’s workspace usually features a white background (interface). Finally, click OK.
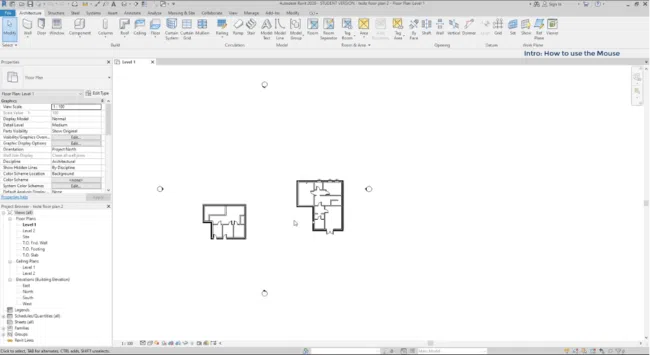
Revit Interface (source)
7. Import the converted floor plan into Revit to enjoy the BIM software’s numerous capabilities.
Scan2CAD Download
If you have ever traced over an imported floor plan or image using Revit’s drawing tools, you will agree with us that the process is cumbersome. And given that raster drawings do not have object snap capabilities, you are likely to misrepresent the actual length/dimensions of the geometric objects. Fortunately, you can bypass these issues using Scan2CAD. To enjoy the myriad vectorization capabilities that Scan2CAD offers, download the software for free to begin your 14-day free trial.
Conclusion
Scan2CAD is a leading conversion software that supports automatic vectorization, thereby offering convenience, speed, and accuracy. In addition to this capability, Scan2CAD also enables you to clean up the raster image, thus guaranteeing a smooth conversion experience. Overall, Scan2CAD offers capabilities not available on Revit. It, therefore, acts as an intermediary whenever you wish to import floor plans to Revit. To enjoy this and other capabilities and features, simply download Scan2CAD and begin your 14-day free trial.
