Any modern maker or manufacturer understands the growing importance of CNC laser engraving and cutting. What was once available as industry-grade tools are now getting released as affordable desktop machines. This makes laser cutting something that can be utilized by a much wider range of users – from large-scale manufacturers to weekend warrior hobbyists.
If you’re looking to get into laser cutting, you’ll have to first learn about how to convert your image files into vector designs that all standard CNC laser programs can handle. Luckily, Scan2CAD is made for just that purpose. In this article, we’ll be taking a look at how to use the program to convert your images into laser-ready files.
Table of Contents
The Basics of Image Conversion

Raster to vector conversion Source
When working with any CNC laser cutting machine, it’s standard to use vector file formats such as DXF, DWG, and g-code. Typically, the only way to convert raster images into these types of vector formats is to open them up on CAD software and then trace over them with digital drafting tools. The process can be long and arduous, so automatic conversion software like Scan2CAD comes in really handy in these situations. Scan2CAD can condense hours of tracework into mere seconds by using automatic tracing algorithms to translate raster lines into vector elements. The program can handle a wide range of formats, both as input and output. It can handle such raster format standards such as JPG, TIFF, PNG, BMP, and GIF. It can even handle vector-to-vector conversion, for those times when you need to convert, for example, DWG files into g-code, or vector PDF into editable DXF files.
Short Demonstration of Scan2CAD’s Raster-to-Vector Conversion
In this animation, we convert a raster image of a wrench into a vector file of its outline using Scan2CAD.
How do I Convert my Image into a Vector File for Laser Cutting?
Video Tutorial
In the following video we convert an image to DXF or G-code for laser cutting. You can try the conversion yourself with the Scan2CAD free trial.
Step-by-Step Guide: Tutorial Breakdown
Here’s a breakdown of the steps we went through in the video.
1. Load up your raster image onto Scan2CAD
Boot up Scan2CAD and click on ‘File’ > ‘Open’. Navigate to your raster file and click on ‘Open’.
2. Clean up your raster image
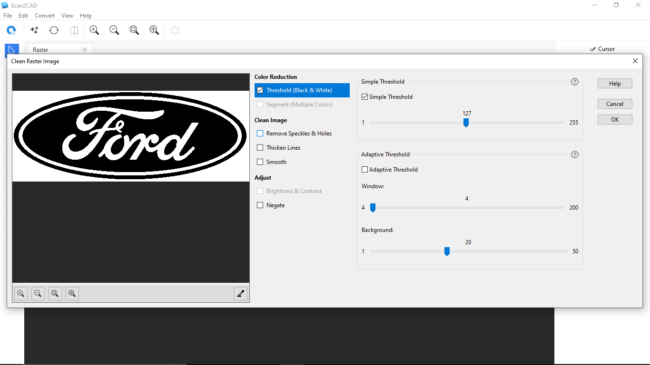
With any conversion software, your output is only as good as your initial image. So it’s good practice to make sure your initial raster image is as clean and as clear as possible. Click on ‘Clean image’ on the upper left of the Scan2CAD interface. In the dialog window that opens, click on ‘Threshold’ under ‘Color Reduction’ to turn it into a completely Black & White image. Additionally, the different options under ‘Clean Image’ are also useful in making your raster image as suitable as it can be for conversion. Once you’re happy with the preview image to the left, click on ‘OK’ to execute the edits.
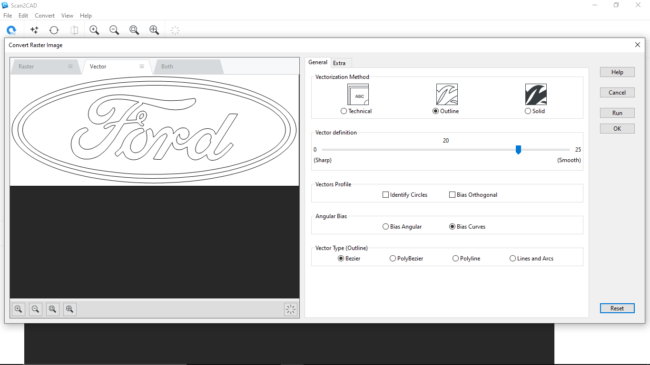
Convert Raster Image Window on Scan2CAD
3. Convert the raster image
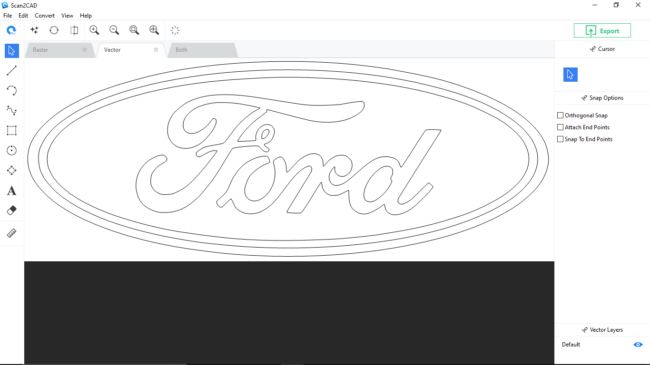
Click on ‘Convert raster image’ right next to the ‘Clean image’ button from the previous step. For most images, you’ll want to stick with the ‘Outline’ vectorization method; it has a handy vector definition slider that you can tweak to get the right amount of smoothing for your output vector. You can also opt to use the ‘CNC Profile’ vectorization preset under the ‘Technical’ vectorization method option, and it has a lot more fine-tuning settings that you can tweak. Click on ‘Run’ to generate a preview and when you’re happy with that, click on ‘OK’.
Clean Raster Image Window on Scan2CAD
4. Save the converted image
Most of the work is done at this point and all that’s left is to save the newly-converted vector file. While on the ‘Vector’ tab, click on ‘File’ > ‘Save as’ > ‘Vector’. Navigate to where you want to save the file, give it a name, and choose the file format you want to save it as (DXF, DWG, or g-code). In this case, you should choose DXF for reasons we have discussed below. Then click on ‘Save’.
Alternatively, you can click on ‘Export,’ which opens the Windows File Explorer. Navigate where you want to save the file, key in the name, choose g-code as the file type, and then click on ‘Save.’
Scan2CAD’s Export Button for Saving Vector Files
How to Use a Laser Cutter
Now that you have a DXF file, it is time to use it as a template that you can send to your laser cutter for it to engrave or cut. Here’s what to do:
1. Connect your computer to a laser machine
2. Open the converted DXF file on Inkscape
A freeware, Inkscape is a popular vector graphics editor that offers numerous functionalities.
3. Set your document area to match the size of your laser cutter’s workspace
You can do this by clicking on ‘File’ > ‘Document Properties’ > Set the width and height under the ‘Custom Size’ section of the window that pops up.
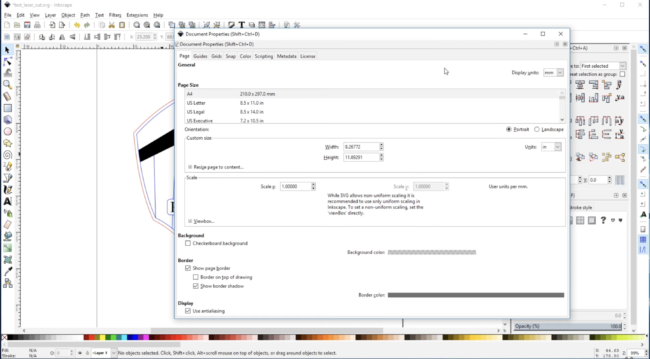
Custom Document Property Settings on Inkscape (source)
4. Determine the sections of the drawings you want to be cut or etched
Typically, and as the name suggests, a laser cut cuts through the material while an etch shaves off some material from the surface. When it comes to laser cutting, there are two categories of etching: vector and raster etching. The former approach involves engraving a file along a linear path. The latter approach simply engraves a material similar to how a conventional printer would – a normal printer prints all the pixels that constitute an image. This means the raster etching shaves off the material as a block rather than linearly.
Upon making the determination, assign colors to each of these sections. For example, many laser machine software associates red with a vector cut, blue with vector etching, and black with a raster etching.
5. Set the stroke width
To do this, head to the the Stroke Style tab on Inkscape and set the width to 0.01 mm.
6. Send the vector file to your laser machine software
On Inkscape, click on ‘File’> ‘Print’> Select the name of the software under the ‘Select Printer’ section.
7. Configure the software based on your cutting needs
Some of the settings you should tweak include speed, power, and frequency. These settings depend on the material you are using as well as the type of cut or etch.
8. Prepare your laser machine
There are several preparatory steps you should take before using your laser machine. These include:
-
- Select a suitable material. Acrylic, wood, and foam can be etched and cut, while glass can only be etched.
- Ensure the material size suffices.
- Set the lens height.
- Set up the fume extractor to evacuate the fumes released by the cutting process from the laser cutter
9. Perform a test cut
This step applies if you have not used your laser cutter for a while. It enables you to determine whether the machine is operating at optimum.
10. Start laser cutting and etching
Some Conversion Tips
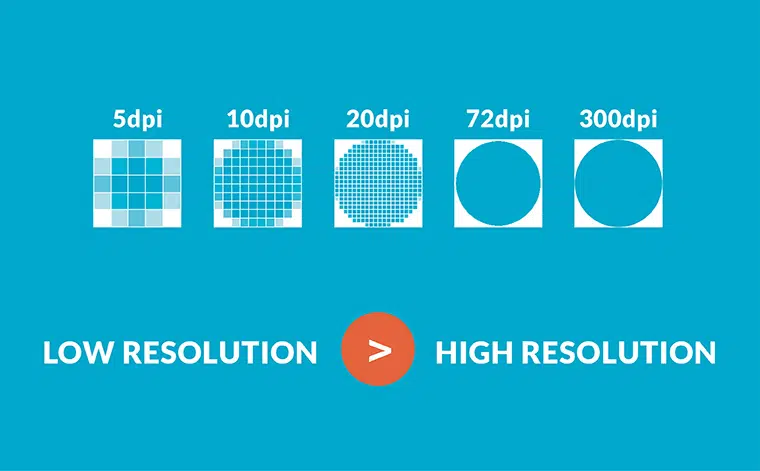
Image resolutions Source
All in all, the process in Scan2CAD takes less than a minute. Do keep in mind, though, that with any conversion process, there are several best practices that result in the best possible vector file. These include:
- Quality of the image/input file
- Clean-up of the input file
- Post-processing (after conversion)
1. Quality of Input File
The most significant factor that determines the quality of the output will always be the quality of the initial image – garbage in, garbage out. So it is imperative to choose the most suitable version of the image for conversion.
2. Clean-up of Input File
Some files may still contain blemishes regardless of the effort you put into choosing a quality image. This is particularly evident with scanned images. Fortunately, Scan2CAD has a few clean-up tools that enhance the quality of the image. These tools include Remove Speckles & Holes, Thicken Lines, and Smooth. Only when you are satisfied with the quality can you embark on vectoring the image.
3. Post-Processing
Once you are done with the clean-up and conversion, all that is left is post-processing work to get the best possible output for laser cutting. The post-processing is unique for different images and laser-cutting programs. In most cases, you’ll want to do the last edits on your preferred CAD software or your laser cutting software if it has editing capabilities. For minor fixes, Scan2CAD has some editing tools to the left of its interface. You can add a few lines or erase any parts of the image you don’t want included in your final output.
What Kind of Images are Suitable for Conversion on Scan2CAD?
- High-resolution images. With lower quality images, you’ll be seeing a lot of jagged, pixelated edges and you’ll want to avoid those as much as you can when doing automatic tracing. The software is designed to accurately depict the source image, so if your original raster file has jagged edges, chances are, the output vector file will have those as well. On the other hand, you don’t want to go too high-quality with your images, since that usually leads to unnecessarily long conversion times.
- Minimal shades and shadows. Having too many high-contrast shadows in the image will obscure some of its details. For laser cutting projects where accuracy and precision are important, you’ll want Scan2CAD to pick up as much detail as it can from the original image.
- Image formats with lossless compression. JPEGs and GIFs are pretty standard formats for image, but the reason they’re so popular is their portability. What they sacrifice in return for their small file size is their lack of detail and quality. Try to shoot for image formats such as TIFF, PNG, or BMP – file types that use lossless compression and have higher image quality that other standard formats.
- Clean, crips images. Image noise in the form of speckles or holes in the raster file will also be picked up by Scan2CAD and converted into vector elements. Use images with as little noise as possible and make sure to utilize Scan2CAD’s ‘Clean image’ tool to edit out any unwanted parts of the image.
- Monochromatic raster images. If you have colored or grayscale images, Scan2CAD’s ‘Clean image’ dialog box has a handy ‘Threshold’ tool to turn them completely black and white. This is the most suitable type of image to convert.
We have a detailed guide on ideal scanner settings that you could follow to get just the right amount of detail in your source image.
Conclusion
Scan2CAD is a versatile and powerful conversion software that allows you to convert raster images to vector files that can be fed into laser machines’ software. In this article, we have covered how to convert raster images to DXF. You can then use Inkscape to edit the DXF file to ensure it can be used as a template for cutting or etching different types of materials.
