Converting an image to DXF with Scan2CAD
JPG is one of the most familiar file formats around, used in online graphics and digital photography and by millions worldwide. In fields like engineering and architecture, however, formats like JPG can be a liability—bringing in a realm of problems in sectors that require ultimate precision. To combat this, many tend to convert from JPG to DXF, for use in CAD software and much more. However, the conversion process isn’t always that simple. To help you along the way, we’ve compiled 5 converting JPG to DXF tips so you can become a pro.
We’ll discuss the pros and cons of using JPG, how you can improve your image before you convert it and even what converters to use. Plus, we’ve included an exclusive free Scan2CAD trial to help you along your way!
Can you obtain the design in a higher quality format?
JPG is one of the most popular raster file formats you’ll ever work with. JPG files typically used for sharing images due to their small file size and 24-bit color depth. Despite this widespread use, however, JPG is not always an ideal format to use. As a raster file format, JPGs suffer from the same issues as every other raster file format. They’re made up of pixels—when you zoom in or try to change the scale, you’ll make them that much more evident. In other words, they’re resolution dependent.
The advantageous small file size of the JPG comes with an even bigger disadvantage for conversion. JPGs are only small in file size because of lossy compression. Lossy compression refers to a process by which images lose quality to ensure smaller file sizes. Unfortunately, this loss in quality makes JPGs unsuitable for conversion.
Your problems don’t just end there. Due to JPG’s heavy image compression distortion is typically created within the image.
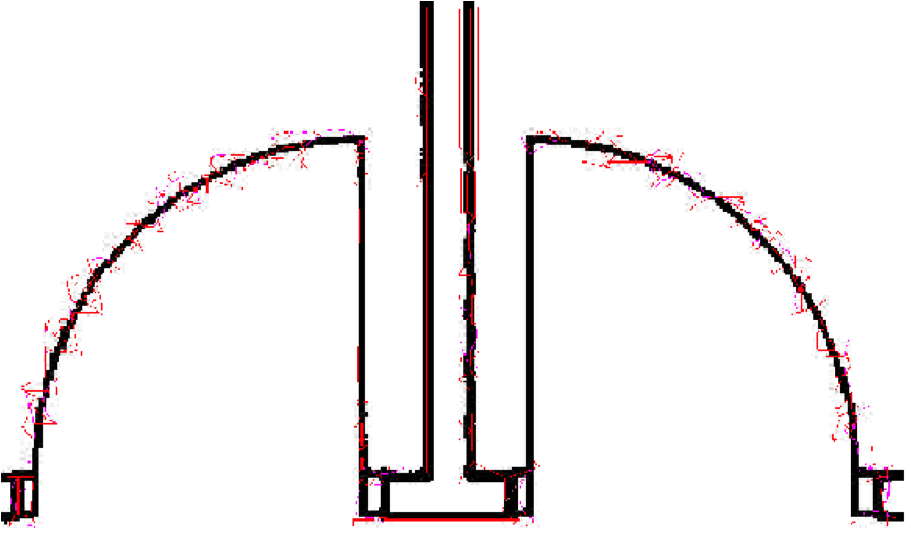
If you were to vectorize a JPG image without first cleaning it you would create vectors for the distortion resulting in a poor quality conversion. As you can see with the red vectors overlaid upon the raster image.
Try a lossless format such as TIFF
The easiest solution to JPG’s issues is to opt for a higher quality format. If you’ve read any of our other help articles on converting to DXF, you’ll have noticed our preference for working with the TIFF format. TIFF is popular among designers and engineers for its high quality and lossless compression. Though TIFF images typically have larger file sizes than JPG, the vast improvement in quality means that this is worth the trade-off.
However, whilst converting from TIFF to DXF generally produces better results than converting from JPG, there’s a word of warning. If you only have a low-quality JPG image, then saving it as a TIFF won’t fix its problems. The image needs to be in TIFF format from the outset to make a difference to the ultimate conversion quality.
If you only have a JPG image, however, you shouldn’t despair. Whilst this isn’t the ideal situation, you can still get a great conversion as long as you follow our remaining tips.
Pick the right image to begin with
Whether you’re switching your format to TIFF or sticking to your regular JPG, you still need to make sure you’re using the right image to begin with. You have to be realistic with what you’re expecting from the conversion. Photos, for example, are almost impossible to convert. Instead, you should stick to synthetic images with few colors and clean lines. You should also avoid black and white images that are saved in grayscale—compression artifacts will make it difficult for software to detect the lines of the image.
If your image—whether JPG or TIFF—is low in quality, all you’re going to get out of it is an even lower quality vector. You should avoid images that are already pixelated. The conversion software won’t be able to differentiate between the different shades and lines, so don’t even bother. Try to stick to lines that are 5 pixels thick to get that perfect vector output. You should also be aware that if you’re using an image that contains broken lines for example, it will make it even harder for software to give you a precise output.
Other warning signs to look out for in low-quality images can be found below…
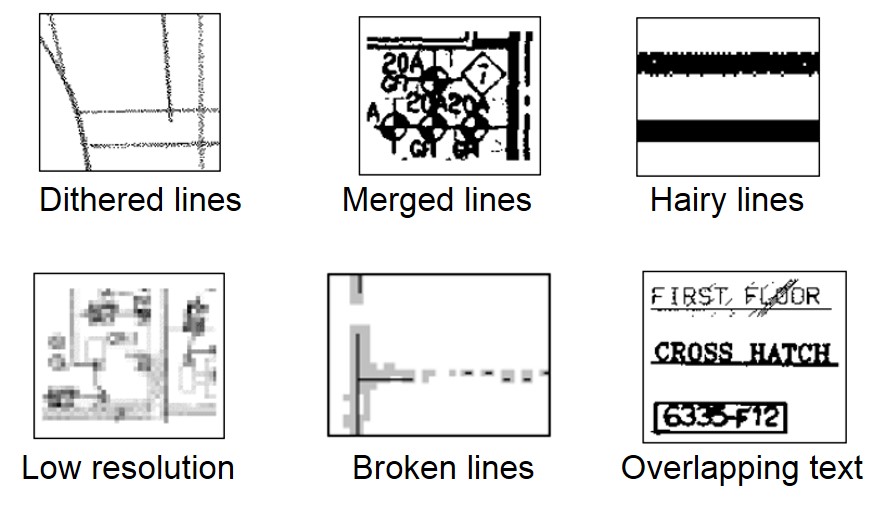
Fortunately, the solutions for the above problems can be found in the next two sections.
Pick the right converter
It’s all too easy nowadays to type “JPG to DXF converter” into your search engine and click on the first converter that pops up. Unfortunately, the process of conversion is never as easy as it seems. Using a free online converter comes with an abundance of problems. For starters, they tend to give users a generic conversion which does nothing for images like technical drawings that need additional feature presets. These converters also tend to come with limitations on file size and the number of images you can convert. Not to mention, you’re practically dicing with death each time you download something—malware is a constant threat.
You’d be surprised how many software packages out there offer automatic tracing—or vectorization—capabilities. Many graphics editor packages like Inkscape, Illustrator and CorelDRAW can be used to convert images. Obviously, your choice depends on whether you’ve got the budget and what kind of capabilities you want. Picking the right converter will set you up for an easier conversion.
If you’re looking for software that will give you a specialized trace, you’ll struggle to find a package better than Scan2CAD. With its own vectorization settings that come with pre-programmed variables, Scan2CAD gives users a specialized conversion no matter what type of image they’re converting—from technical drawings to contour maps to CNC designs. In mere seconds, you can convert your JPG to a DXF ready for use in CAD software.
Clean your image before conversion
It’s not always as simple as converting your image right away. You should always take the time to clean up your image before you convert it—giving you the best possible chances for that perfect vector output. As we’ve already discussed, there’s a variety of issues that plague raster images include: pixelation, low resolution and broken lines.
Scan2CAD comes with a full editing suite that makes these issues a thing of the past. Firstly, you can reduce the number of colors you’re using in your image—the less you have, the clearer the contract will be between the image and the background. This will enable the software to pick up on the shapes and lines easily. If you’re using a JPG, Scan2CAD’s Thresholding tool is the ideal solution. To avoid grayscale, you can use Thresholding to firmly divide your image into black and white pixels—ideal for scanned images:
- Simple Thresholding applies the settings to the whole image
- Adaptive Thresholding applies different settings to different parts of your image
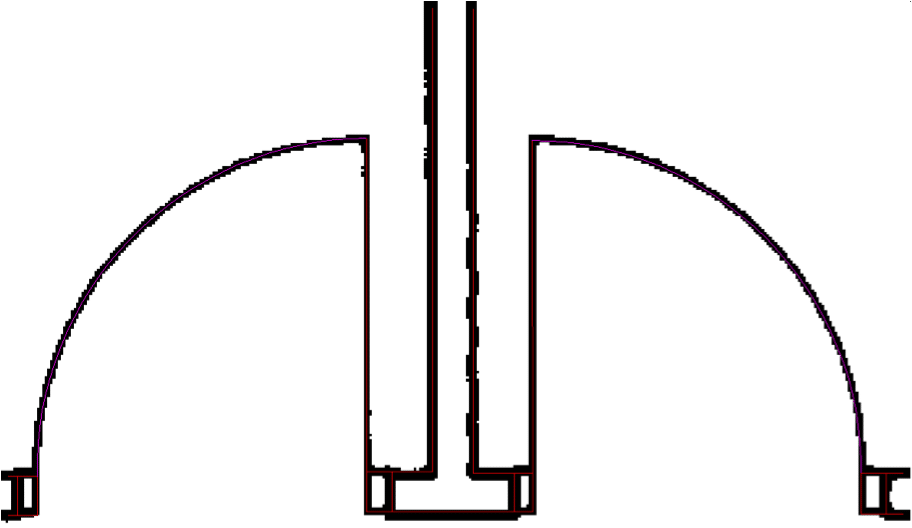
Above is the result of Thresholding the JPG with a value of 127 and converting the image from JPG to DXF.
And that’s just the beginning! Scan2CAD comes with even more cleaning tools to get your image up to scratch before you convert it. You can use tools like Thicken to fix dithered or broken lines. If you’ve got an image with holes or speckles you can remove them in the click of a button. Once you’re happy, you can Smooth the image to remove any remaining hairy lines or imperfections. While we don’t advise using JPGs, it is possible to tidy them up enough to get a satisfactory conversion. All that’s left is to click Vectorize and you’ll be able to save your image as a DXF.
Edit your vector design after conversion
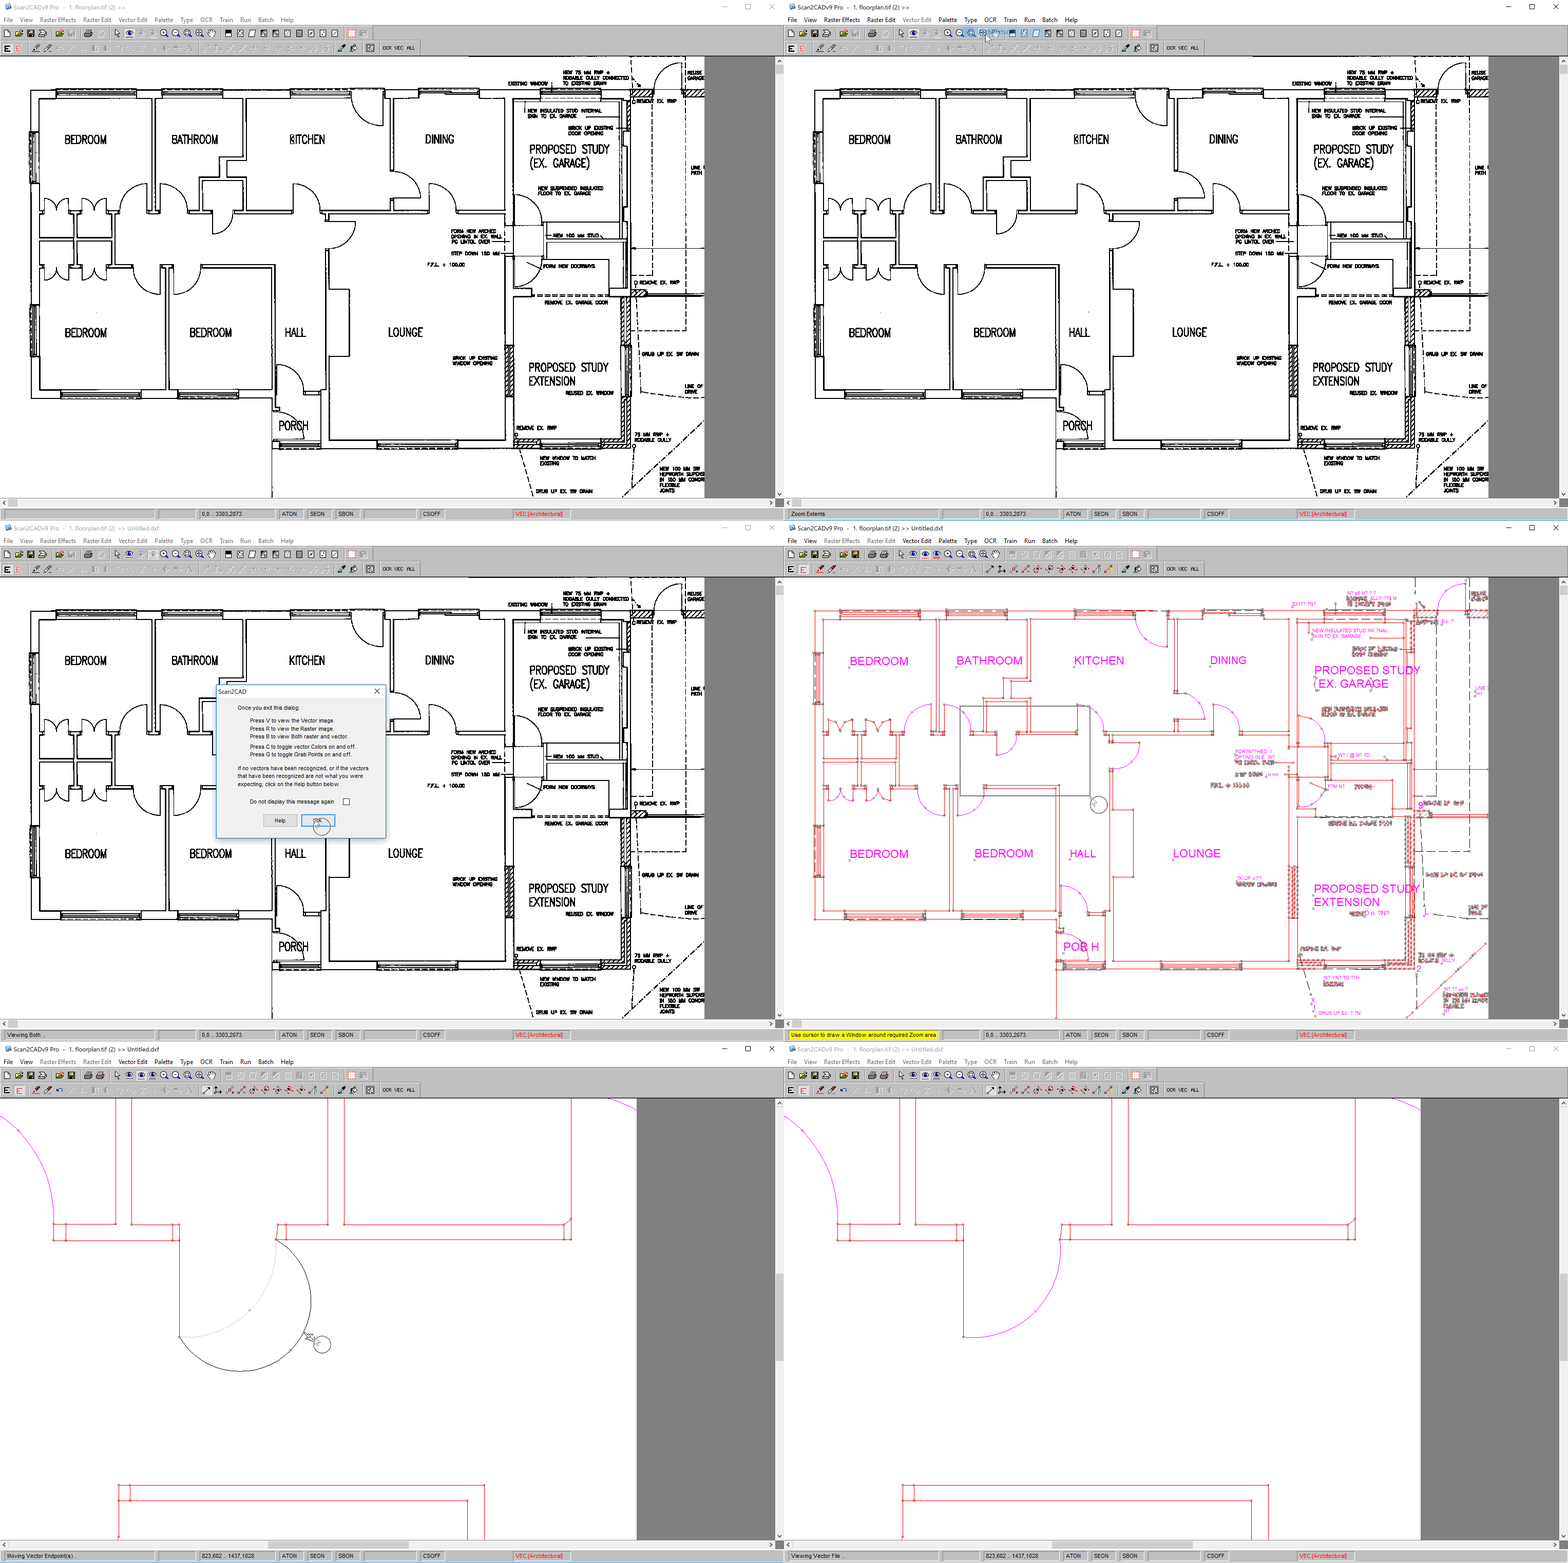
While Scan2CAD can clean up your image extensively before your conversion, this doesn’t mean you’ve not got anything left to do after conversion. At best, it’s about 80-90% done. Once you’ve finished a conversion with Scan2CAD—or any other converter—you should look over your vector to make sure all the elements in your image have been correctly recognized—for example, checking that sharp corners haven’t been converted into smooth arcs.
If you want to check that all of your vector elements have been converted properly, you can view Vector Colors. You’ll be able to see hatch lines in brown, polylines in green, circles in dark blue and much more. If your image has handwritten text in it, you might find that it’s not been converted properly. While Scan2CAD does have Intelligent OCR which is trained to detect handwritten text, it can—more often than not—be easier to use the Erase Area tool and type over the area with your required text.
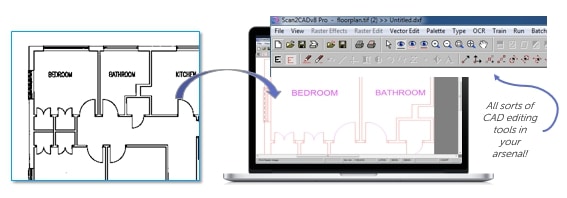
Scan2CAD comes with a complete suite of raster and vector editing tools
Scan2CAD’s top tip to help with the post-conversion tidy up is to use grids to zoom in to view each grid square. You can then check whether your lines are straight and clean. If you’re not happy with the final result, you can always go back and modify your original raster image.
Convert JPG to DXF – try for free
If you’re looking to convert from JPG to DXF, you can’t go wrong with Scan2CAD. A market leader in conversion, Scan2CAD’s primary focus is the conversion of technical drawings to editable vector images—ready for use in CAD, CAM and CNC software. Not only does it offer specialized conversions, it also gives you a full editing suite, batch processing and flexible licensing.
You can try Scan2CAD’s full capabilities and convert as many JPGs to DXFs as you want in the free 14-day trial—with no watermarks, no limits and absolutely no obligations!
JPGs aren’t the only format you can convert to DXF—we’ve covered the conversion of PNGs, TIFFs and much more. Interested in converting to a different file format? Check out our articles on converting to DWG instead.


