
 It’s a great time to be a designer, maker and a creative business! The Internet is there for you every step of the way – from ideation to production. There are blogs to find inspiration from, accessible software to translate your ideas onto paper (or screen), on-demand manufacturing services for hire and online marketplaces to sell your finished product. Anyone can design something on their laptop and have the physical item produced quickly and affordably.
Scan2CAD is part of this maker movement. In this tutorial, we’ll show you how to use Scan2CAD to make a laser-etched wooden plaque. Laser etching or laser engraving is the process of burning a design onto a piece of material using lasers. You could perform laser etching on all sorts of materials, including wood, metal, leather, card, felt and so on. The only technical bit is producing your design in the correct file format. Well, let’s get started!
Step 1: Prep your canvas
First of all, let’s prep our canvas by clicking the new raster file icon. A dialog box will pop-up, on which you should select “1-bit color depth”. This means the canvas only supports two colours – black and white. We don’t need any color information for laser-etching! Any colored JPEG images will be automatically converted into black and white.
Step 2: Choose your image and convert it to vector
Next, let’s add the image you’d like on your plaque. Select Raster Edit > Paste From > File. Locate your chosen image file and click Insert. Luke’s chosen a minion, which is his niece’s favourite cartoon character. Move the image to the desired spot on the screen.
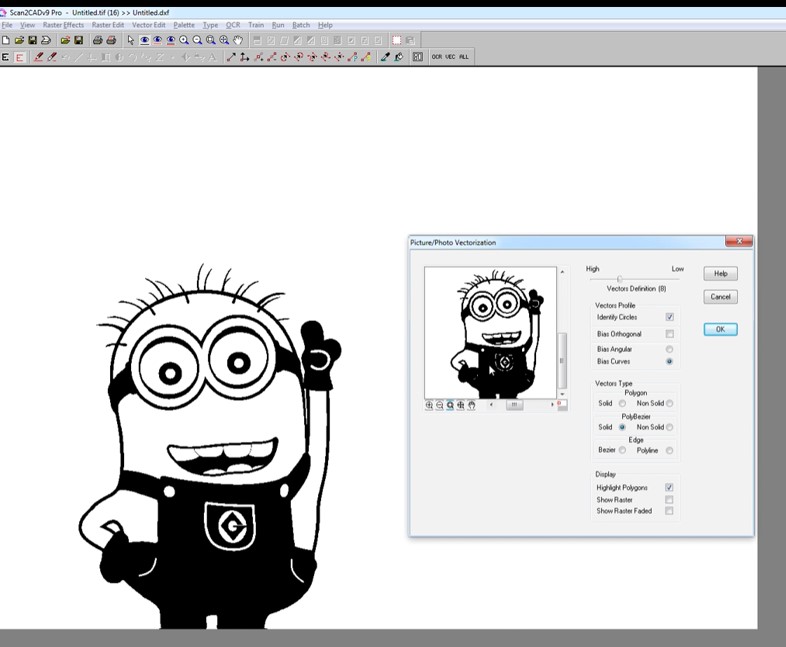
The next part is converting this image to vector instructions, which is Scan2CAD’s speciality. Select Type > Picture/Photo and then the VEC button on the toolbar. The Raster Photo Vectorization dialog box will appear. We used these settings: Solid Polybeziers and Highlight Polygon. You can play around with these settings to create your desired output; there’s a preview window to show you what each setting does.
Step 3: Add some vector shape, such as a frame for the text
We’ve used a vector frame from Scan2CAD’s freebies library. We’ve used one from the vintage frame vector shapes pack. To insert the frame, select Vector Edit > Paste From > File and locate the file. Then, just erase the unwanted frames using the Vector Erase Tool. You can also resize the desired frame by right-clicking on the frame and select Modify > Scale > Scale using cursor.
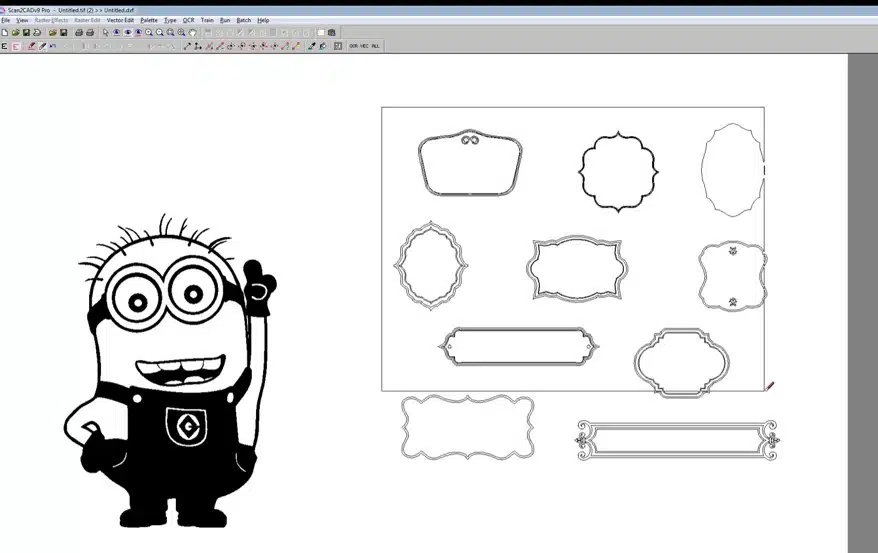
We chose a vector shape from our Scan2CAD Freebies: Vintage Frames Pack
Step 4: Add some text.
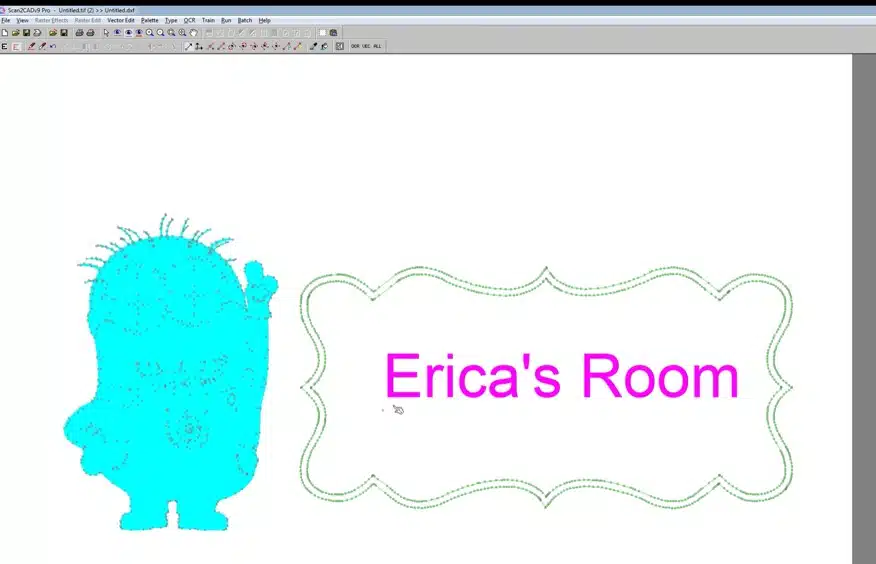
Finally, it’s time to personalize the frame. You can add text using Vector Draw > Text. Remember to save it as text, so that it’s editable in the future. To move the text, just hit G on the keyboard to show grab points and use the text grab point.
Step 5: Save your design as a DXF file
Simply select File > Vector > Save As and name the file. The DXF file format is the recommended file type for CNC and laser etching machines.
Step 6: Find a laser-etching service and bring your design to life!
Just Google “laser engraving services” or “CNC service” and you’ll find different vendors you can work with to produce your design. Just upload your design onto the vendor’s site, pay and they’ll deliver the finished product to your doorstep! Prices begin from as little as $3.
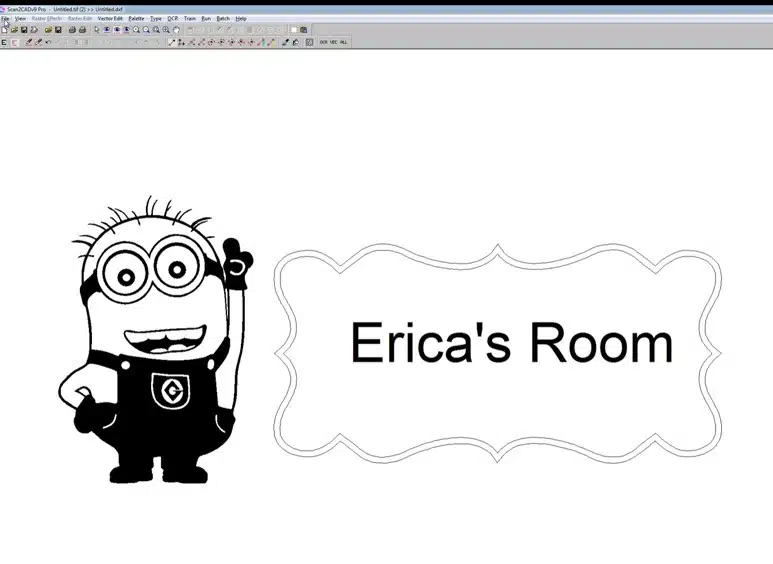
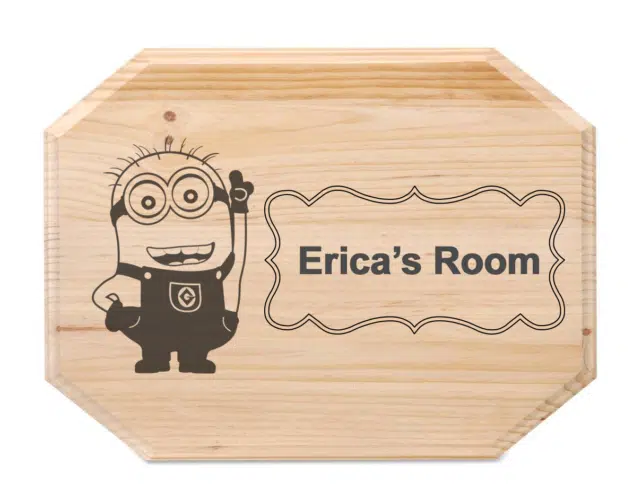
Ta da! Here’s the final design ready to be shipped off to a laser etching machine
Related, here’s a video demonstrating how to convert an image for CNC with Scan2CAD. Enjoy!
That’s a wrap
That’s it! Though a simple little project, the result is a really professional product once manufactured. You can use the same technique to make a sign for your event or business, design jewellery to sell on Etsy, make trendy art… can you imagine the possibilities?!
