Table of Contents
About Creo
Creo is a set of apps focused on computer-aided design (CAD) specifically for the product design and manufacturing niches. The software suite is developed by PTC Inc., formerly known as the Parametric Technology Corporation, which is a computer services and software company based in Boston, Massachusetts. The different apps in the Creo suite each deliver a unique set of functionalities for different types of users. The apps primarily run on Microsoft Windows and can handle 3D CAD and modeling, 2D orthographic views, as well as product visualization and simulation.
Some of PTC Creo’s main competitors in the market are Solidworks, Solidedge, and CATIA. Users familiar with these pieces of software will have an idea of Creo’s capabilities. The software suite supports various operating languages that range from English, German, and French to Russian, Japanese, and Chinese just to name a few.
Image importing in Creo
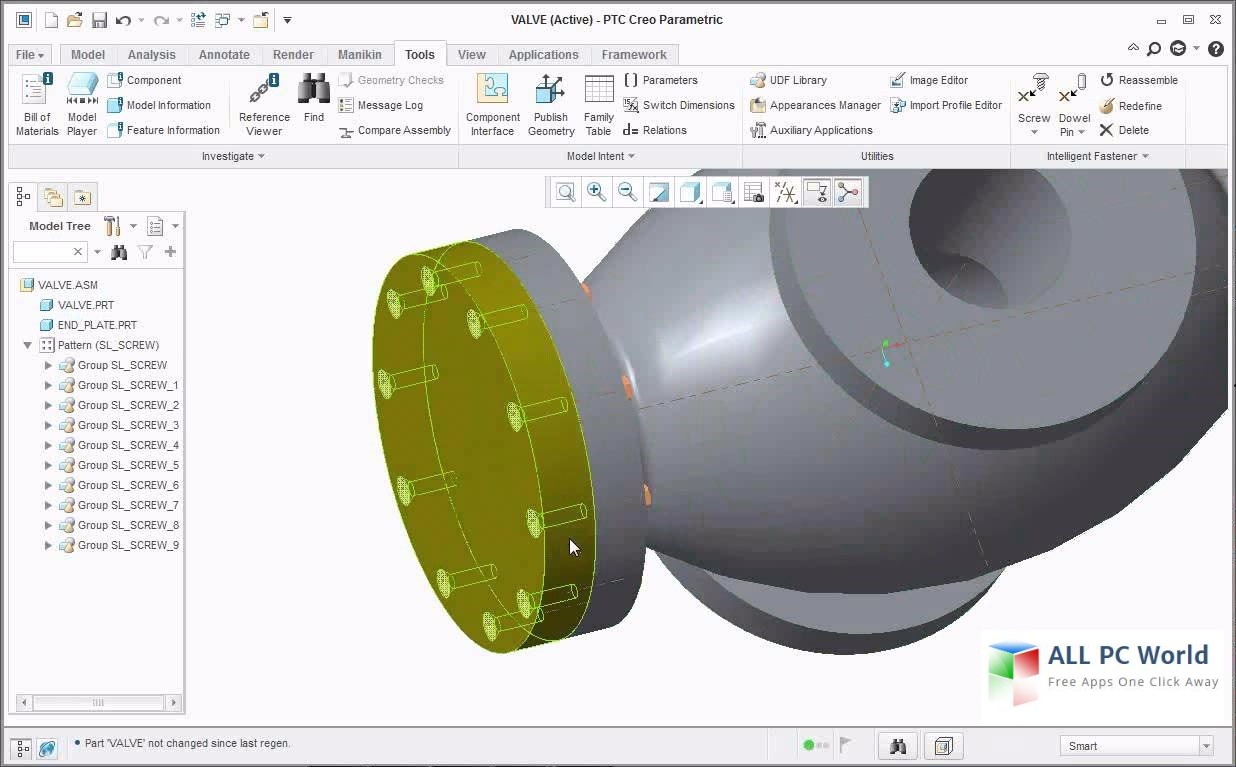
Creo’s standard user interface Source
Creo is typically used to draft up plans or to model a product or machine part. In those kinds of workflows, users will typically need to import 2D sketches or schematics of designs into a Creo drawing sheet for reference. These engineering drawings will typically contain information such as calculation and simulation results, visualization renders, or product dimensions.
Ever since the updated Creo 7 back in 2017, the process of importing these images has been made easier than ever. It’s similar in simplicity to inserting images into PowerPoint or Word files, but let’s first talk about the preliminary requirements of inserting images into Creo worksheets.
It is important to always choose suitable images to import into Creo. The cleaner and more high-definition an image is, the more suited it will be for use. Since users will be using these drawings as bases for model dimensions, making sure you get precise dimensions would be key.
Here are the basic steps to importing an image into Creo:
- The first step to importing a 2D image is to locate the ‘Images’ button in the Layout menu.
- After clicking on that, a dialogue box will open. Just browse through the folders and locate the image you want to import. When you’ve found it, just click on ‘Open’ and it should be inserted into the current view you are working on.
- From here on out, it’s just a simple matter of dragging and moving the inserted image to where it’s supposed to be and editing the scale, angular rotation, and the transparency of the image if need be.
If things are still a little unclear to you, here’s a video to help guide you through the process:
As for translating the information in the image into vector, PTC Creo is, unfortunately, not the type of CAD program that has an automatic tracing tool. If you’re looking for that kind of functionality, there are third party programs such as Scan2CAD that can do that for you. But if you’re looking to do all the conversion in Creo, your only option is to trace over the reference image manually. This is why image quality is so important.
The sketch tools in Creo are pretty intuitive and easy to use especially if you’re familiar with the sketch tools in other CAD programs. They have the standard fare – straight lines, arcs, splines, polygons, and circles, among other geometry. Just choose the tools you want to use and get to tracing over the reference image.
This manual tracing process can be a little tedious, so if you’re looking to use the automatic tracing options discussed earlier, here’s a basic idea of how that workflow might work: We take your raster image and open it up on Scan2CAD, we convert the image into a workable vector file in the program, and then we open that file directly into Creo.
What we’ll be working with on Creo is a fully editable vector file that you no longer need to manually trace.
We’ll go into detail with the conversion processes discussed here shortly, but let’s discuss first the different file types and file formats that Creo and Scan2CAD can handle.
Raster vs. Vector
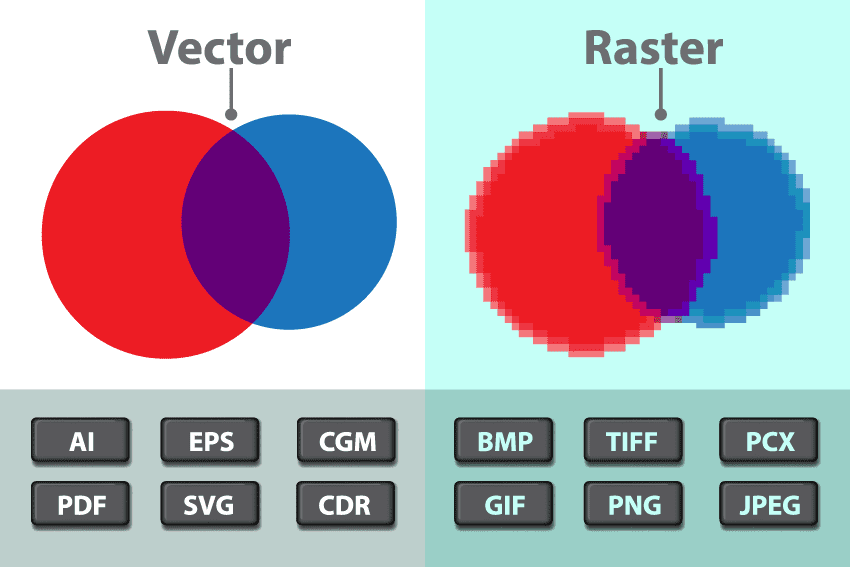
Raster and Vector Images Source
When dealing with images to import into Creo, you’ll mainly be noticing two types of them – raster images and vector images. Let’s take a moment to discuss the difference between these two main image types.
Raster images – or bitmap images, as they’re sometimes called – are images formed by clustered, colored pixels. The typical image files users will be familiar with such as JPEG, PNG, GIF, and BMP are all examples of raster images. A type of digital pointillism if you will, raster images will have varying quality depending on their resolution or file size which is dictated by how many pixels make up the image. So if you have images with small resolutions, they’ll most likely have pixelated or blurry elements in them. These are not suitable for importing into Creo since as we mentioned before, it’s important that we have high-quality images to maintain accuracy and precision when tracing over with Creo’s sketch tools.
In contrast, vector images are generally easier to work on in Creo since these are made up of editable geometric objects that can be loaded up and worked on in most CAD programs. Most files that you actually get from CAD software, Creo included, are vector files. So the typical DWG, DXF, and G-Code file formats are all vector files. The main difference between raster images and vector files is while raster images are made of pixels, vector files are made of specific geometric elements such as lines, fills, arcs, and splines. In general, image quality is not an issue with vectors, since the information in these files is not dictated by the number of pixels but by mathematical data that determine the attributes of the elements in the image, such as the line width, color, and length.
To illustrate the difference between raster and vector, let’s imagine a picture of a black circle. If this black circle were a raster image, the file would basically be a cluster of black pixels that are grouped together to create an image of a black circle. If it were a vector image, the file itself would actually be a group of entry data that dictates the size and color of the circle.
In general, we would prefer working with vector images on Creo than raster images since this helps us skip the step of tracing over the raster image with our sketch tools.
File formats for Solidworks
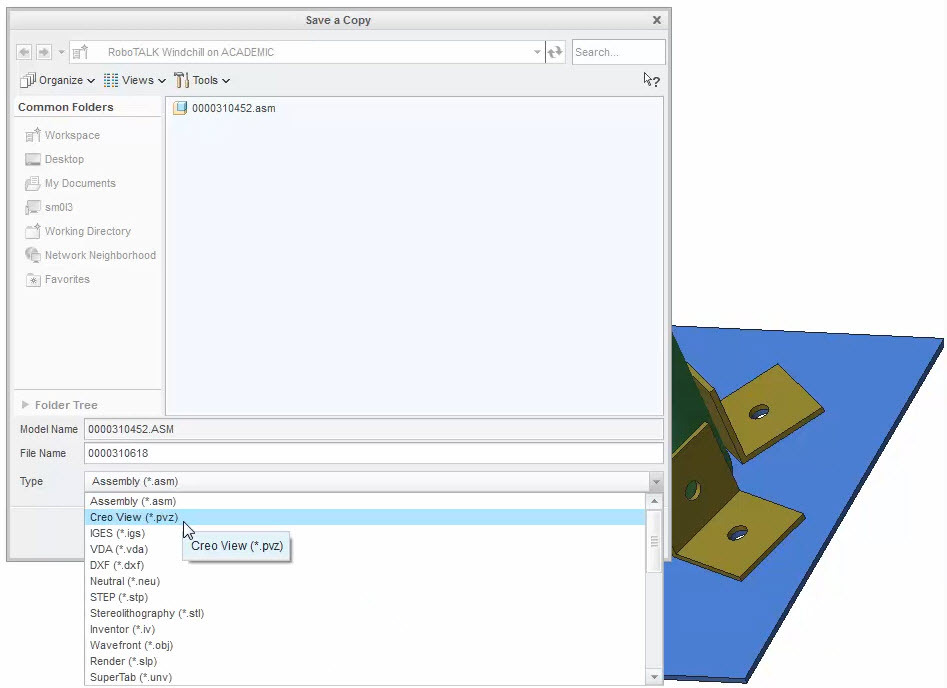
Creo supported file formats Source
PTC’s Creo supports a lot of different export and import file formats. We’ve compiled them below:
|
For Import |
|
|
3D/ 3D Model |
– Creo View (.ol) – IGES (.iges) – STEP (.stp, .step) – JT (.jt) – Stereolithography (.stl, .sla) – MicroStation (.dgn) – PTC Visualizer (.gbf, .gaf) – AutoCAD (.dxf, .dwg) |
|
2D Drawing |
– IGES (.igs) – Stamp (.png) |
|
Structure/ Compressed structure and geometry |
– Creo View (.pvs, .ed, .pvz, .edz, .zip) |
|
Parts and Assemblies |
– Creo Parametric (.prt, .asm) – VRML (.wrl, .vrml) |
|
Creo Unite |
– SolidWorks (.sldasm, .sldprt) – CATIA V5 (.cgr, .CATPart, .CATProduct) – NX (.prt) |
|
For Export |
|
|
Image files |
– Bitmap (.bmp) – GIF (.gif) – JPEG (.jpg, .jpeg) – PNG (.png) – TARGA (.tga) – TIFF (.tif, .tiff) – 2D PDF (.pdf) |
|
3D file |
– IGES (.igs) – 3D PDF (.pdf) – U3D (.u3d) – VRML (.wrl) – STEP (.stp) |
|
2D illustration file (from HLR render mode) |
– ISO (.iso) – CGM (.cgm) – SVG (.svg) |
Convert a PDF to Creo with Scan2CAD
- Take a raster image file or PDF that you want to use as a reference image on Creo and open it up on Scan2CAD first.
- If you’re dealing with a PDF file and the file is already made up of vector elements, just skip to the last step of this workflow. If you’re dealing with a raster image, you’ll have to clean up the image first and turn it monochromatic for a cleaner conversion.
- After cleaning up your raster image, you can go ahead with the conversion proper. We have plenty of tutorials that detail the different settings you can tweak depending on your image quality and type, but for the most part, schematic drawings will convert properly with the default ‘Technical’ Vectorization Method.
- After clicking on ‘Run’ to see a preview of the converted image, you can click on ‘OK’ to run the conversion process.
- With your newly converted vector file, just save the file using the file format that you want to use. Creo will readily open DWG or DXF files, so try to pick between those two.
We have plenty of tutorials on how to effectively use Scan2CAD here, so feel free to peruse our video tutorials if you want to find out more about our software.

