SketchUp is one of the most well-known and widely-used 3D modeling software available out there. Ask any architecture student or furniture design enthusiast, and more likely than not they’ll tell you this program is a consistent top contender in their lists of most frequently-used products. The software is known for a variety of applications that revolve around the construction and design industry. It’s used in industrial design, interior design and decoration, architecture, landscape architecture, various engineering disciplines, film and stage design, and video game design.
One of the biggest reasons for this is the program’s accessibility – it comes as a free-to-use web-based application known as SketchUp Free and has a now un-updated but free downloadable desktop version known as SketchUp Make. Sketchup Pro, the paid version of the program, has added functionalities and import-export options.
The program is also popular for its incredibly intuitive interface – most new users find themselves shocked at how easily they get the hang of using the product. If you’re reading this article, it’s safe to assume you’re fairly familiar with how the software works, probably as a relatively new user. Now, the next logical step after getting familiar with Sketchup would be to figure out how to get faster at using it. We’ll be discussing one of the most helpful topics when it comes to mastering 3D modeling with Sketchup: keyboard shortcuts.
Here in Scan2CAD, we’re big supporters of the use of keyboard shortcuts; we have a bunch of previous articles that help readers figure out how to use their favorite design software faster and more efficiently. Keyboard shortcuts are great time savers and let you get your ideas onto Sketchup and other software quickly. Your modeling experience gets more seamless and intuitive and in general, there’s less friction between the program and your design ideas.
A lot of users will typically feel overwhelmed with most keyboard shortcuts lists for design programs. Lucky for SketchUp users, SketchUp actually keeps its list short and neat. And really, with how easy the program is to use, you only need so much keyboard shortcuts.
Default Keyboard Shortcuts
Sketchup’s default keyboard shortcuts are fairly easy to get a handle on. You can access them through the program by opening up the Window tab, going to Preferences and then Shortcuts. You’ll have a list of all the available shortcuts that are set on SketchUp by default and even add your own custom ones, but we’ll talk about that later. The SketchUp website itself has its own easy viewing guide for keyboard shortcuts, but for now, what we provide here is a concise list of SketchUp keyboard shortcuts for your own easy reference.
You can specify the amount of the arc’s bulge by typing a number and then pressing Enter.
You can specify the radius of the Arc by typing the dimension, pressing R, and hitting Enter.
You can specify the number of segments of the Arc (more segments mean smoother-looking Arcs) by typing the number of segments, pressing S, and hitting Enter.
Axis Lock (Arrow Keys)
Lock Axis when generating or moving an element.
Up Arrow for the Blue Axis.
Left Arrow for the Green Axis.
Right Arrow for the Red Axis.
Down Arrow for Parallel or Perpendicular Axes.
Circle (C)
Use Circle tool.
You can lock the program’s current inferences (i.e. Axis, Plane, and Perpendicularity of generated element) by pressing Shift.
You can specify the Radius of the Circle by typing the dimension and pressing Enter.
You can specify the number of segments of the Circle (more segments mean smoother-looking Circles) by typing the number of segments, pressing S, and hitting Enter.
Eraser (E)
Use the Eraser tool.
You can soften/smooth surfaces by using the Eraser to take away the edges but retain the surface adjacent to them. Do this by holding Ctrl (Win) or Option (Mac).
You can unsoften/unsmooth surfaces by holding down Ctrl (Win) or Option (Mac) and Shift.
You can use the Eraser shortcut to Hide elements instead by holding down the Shift key.
Line (L)
Use the Line tool.
You can lock the program’s current inferences (i.e. Axis, Plane, and Perpendicularity of generated element) by pressing Shift.
You can specify the length of the line by typing in the dimension and pressing Enter.
Move (M)
Move the selected element.
You can make a copy without displacing the original element by holding down Ctrl (Win) or Option (Mac).
You can copy an element and create an External Copy Array in a row by moving the first copy, typing the number of copies in the array, pressing X and then Enter.
You can copy an element and create an Internal Copy Array in between by moving the first copy, typing the number of copies in the array, pressing X and then Enter.
You can lock the program’s current inferences (i.e. Axis, Plane, and Perpendicularity of generated element) by pressing Shift.
You can move otherwise unmovable elements due to face or edge constraints by enabling auto-fold. Hold down Alt (Win) or Command (Mac).
You can specify the distance you’re moving an element to by typing in the distance and pressing Enter.
Offset (F)
Offset line or perimeter objects.
You can allow resulting offsets to overlap by holding down Alt (Win) or Command (Mac).
You can specify the distance of the offset by typing in the distance and pressing Enter.
Orbit (O)
Orbit the view of the model.
You can also Orbit by pressing the mouse’s middle scroll button.
You can disable “gravity-weighted” orbiting by holding down Ctrl (Win) or Option (Mac).
You can activate the Pan View tool by holding Shift. You can also do this by pressing the mouse’s middle scroll button while holding Shift.
Paint Bucket (B)
Use the Paint Bucket tool to change or copy the Materials on Face elements.
You can fill a face and all adjacent faces with the same material by holding Ctrl (Win) or Option (Mac).
You can replace all matching material faces in the model with your currently selected material by holding Shift.
You can replace all matching material faces in the selected object with your currently selected material by holding Shift and Ctrl (Win) or Option (Mac).
You can sample a Material by holding down Alt (Win) or Command (Mac).
Push/Pull (P)
Push or Pull a selected face on an object.
You can utilize the Push/Pull and create a copy of the original face and leave the original face in place by holding down Ctrl (Win) or Option (Mac).
Apply the same amount of Push/Pull as the previous face by double-clicking.
You can specify the distance you’re moving an element to by typing in the distance and pressing Enter.
Rectangle (R)
Generate a rectangle.
You can start drawing the rectangle from its center by pressing Ctrl (Win) or Option (Mac).
Specify the dimensions of the rectangle by typing in the length, a comma, and then the width, and then press Enter.
Rotate (Q)
Rotate a selected element.
You can rotate a copy and keep the original element in place by pressing Ctrl (Win) or Option (Mac).
You can specify the angle of rotation by typing in the angle and pressing Enter. You can indicate this as a slope by typing the value for the rise, a colon (:), and then a value for the run, and then pressing Enter.
Scale (S)
You can scale the size of an element up or down.
Hold down Ctrl (Win) or Option (Mac) to scale about the element’s center.
To scale the object uniformly, you can hold down Shift.
You can specify the scale factor by typing in the number and pressing Enter. You can specify the factor in length units by typing in the units after the number.
Select (Spacebar)
Select elements with this tool.
You can add to the current selection by holding Ctrl (Win) or Option (Mac).
You can add/subtract to/from the current selection by holding Shift.
You can subtract from the current selection by holding Shift and Ctrl (Win) or Option (Mac).
Tape Measure (T)
Make use of the Tape Measure tool to create guides or measure lengths.
You can resize the model by measure a distance, typing the intended size, and pressing Enter.
Zoom (Z)
Zoom in and out of the view of the model.
You can use this to change the Field of View of the model by holding down Shift and click-dragging the mouse.
Custom Keyboard Shortcuts
Other than the default keyboard shortcuts, we’ve mentioned before that it’s possible to add custom shortcuts for different SketchUp tools and functions. This is especially useful for specific tasks you find yourself doing regularly but don’t have keyboard shortcuts for.
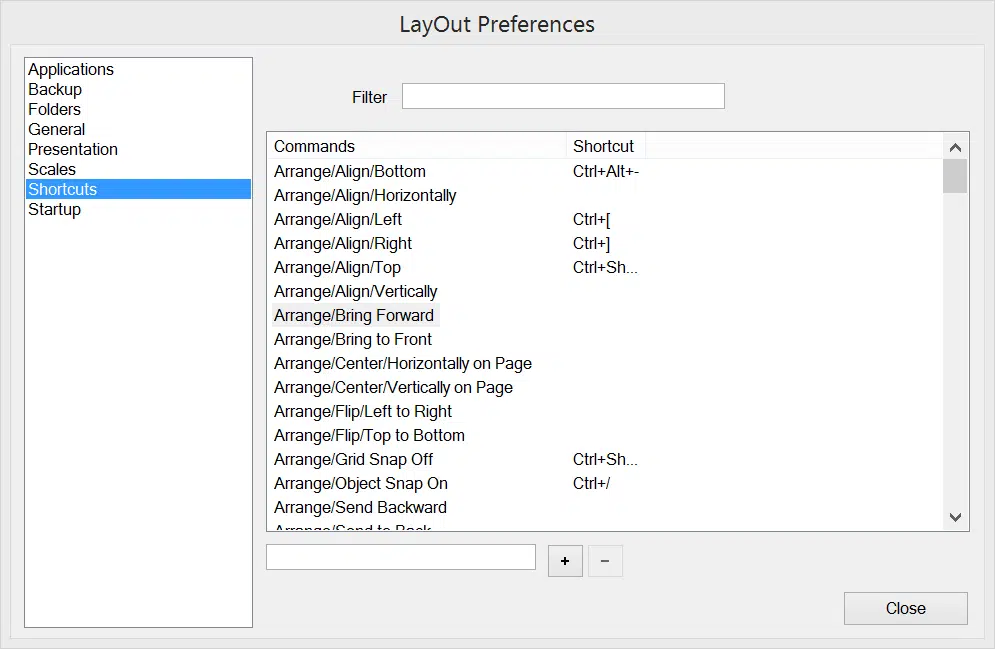
Adding a custom keyboard shortcut in SketchUp. (Image source)
To customize or add personal keyboard shortcuts, click on the Window tab, go to Preferences and then Shortcuts. Look for the command – it even has a useful search function for that – and click on Add Shortcut. Tap the key combination that you want to sue and then click the plus sign to finalize the shortcut.
You can export your keyboard shortcuts by clicking export on the same Shortcuts dialog box. In the same way, you can import any custom keyboard shortcut presets that you see fit.
With all this at your disposal, you’re well on your way to being the fastest SketchUp user in the West. Master the default shortcuts, customize what you want, and add your own.