CNC is at the heart of today’s maker community. All you need nowadays to start a project off is a cut-ready CNC DXF design and a CNC machine. The possibilities are endless—you could create a variety of products ranging from stencils to laser-cut jewelry. But where exactly can you find these DXF designs? Well, we’ve already looked at the variety of websites that offer free designs. This article however, will show you how you can get exclusive DXF design packs sent to your email every single week!
Not enough for you? We’ll explain the CNC design guidelines, and what cut-ready means. And, if you’ve already got your own images to use, we’ll even show you how you can use Scan2CAD to convert these designs ready for CNC use.
Table of Contents
- What is CNC?
- How do you design using CNC?
- How does Scan2CAD convert images for CNC?
- CNC: the do’s and don’ts
- What does cut-ready mean?
- Free DXF designs
What is CNC?
CNC stands for Computer Numerical Control. It’s an umbrella term used to describe a variety of machines that are controlled by a computer. Essentially, the physical movements of these machines are controlled by specific instructions—commonly following the Cartesian coordinates format. By using these machines, you can create anything from laptop decals to wooden signs.
What type of CNC machines are there?
There are many different types of CNC machines out there, the ones below are just the tip of the iceberg!
- CNC mills. Milling is a process that removes material from a piece by feeding a tool specific directions and angles.
- Plasma cutters. This involves cutting a material (usually metal) using a plasma torch.
- Laser etching. This process burns designs onto a piece of material by using lasers.
- Vinyl cutters. These machines use a sharp blade to cut shapes out of adhesive vinyl.
- Embroidery machines. These sewing machines move their needles to follow a pre-programmed digital embroidery pattern.
You can use a variety of materials to cut and engrave from, ranging from acrylic sheets to plastics, metals, glass and even rubber. Needless to say, the possibilities are endless. Don’t believe us? Check out our 11 innovative CNC project ideas! If you haven’t got a CNC machine of your own, why not look at Scan2CAD’s top CNC kits for beginners?
How Do You Design Using CNC?
To begin the CNC process, your design needs to be a vector file format like DXF, as opposed to a raster file format like JPG. Not sure what the difference is between rasters and vectors? Check out raster versus vector.
A vector image is a set of mathematical instructions that will dictate how your image is rendered. The numbers are essentially coordinates that control the movement of your CNC machine, e.g. making the machine carve a straight line by moving the cutter 3 units right, starting at point A. These instructions will be fed into your CNC machine, which will then create your design.
You could manually trace your image to convert it to a vector; however, most people opt for automatic conversion software to convert an image for CNC. This software can trace a raster image using vectorization algorithms to convert it to a vector. Of course, you have to use the right kind of conversion software, otherwise you’ll encounter the many pitfalls of online converters.
This is where Scan2CAD comes in. Scan2CAD is a conversion software which comes with a range of raster and vector editing suites to help you create the most optimal vector image you can use for your CNC design. And believe us—it’s a super fast process. But don’t just take our word for it, look at the animation below to see it in action!
In this animation we convert an anchor image to a vector outline for CNC using Scan2CAD
Want to know how the Scan2CAD conversion process works? Check out the JPEG to DXF conversion process, or read the next section.
How Does Scan2CAD Convert Images For CNC?
If you’ve already got your own images that you want to use in your CNC projects, you might be wondering how to go about converting them for CNC. Well, have no worries—this is where Scan2CAD truly excels. Scan2CAD is the ultimate vectorization software, and can convert rasters to vectors, making them ready to use for CNC purposes.
So how does the process actually work?
Scan2CAD’s vectorization process is completed in mere seconds—it couldn’t be easier.
- Load your raster in Scan2CAD. This is just like loading a file in any other program. Click ‘File‘ > ‘Raster‘ > ‘Load‘.
- Select your image setting type. Scan2CAD comes with vectorization settings, each of which are tailored to produce optimal results for specific types of images. CNC profile ensures that your image is made up of single line cut paths instead of multiple polylines. Click ‘Type‘ > ‘CNC Profile‘.
- Convert your image. To vectorize your image you can click:
 : which converts lines, curves and shapes to vectors.
  : to convert raster text to vector text.
  : which converts the entire image (lines and text) to vectors.
- Save your file. Click ‘File‘ > ‘Vector‘ > ‘Save As‘. You can save your vector in any CNC-compatible format. The most compatible format is the DXF file format—every CAD/CAM/CNC software supports it. You can also save your vector into G-code formats like NC, TAP and CNC.
And there you go—you’re all finished! You can now import your new vector file in any CAD/CAM/CNC software to use with any CNC machine. If your interest is piqued, you can try out Scan2CAD’s free 14-day trial with absolutely no limitations—just click the button below.
download Scan2CAD for free here
Designing for CNC: The Dos and Don’ts
If you’re looking to convert an image for CNC as shown in the above section, you might be wondering if there are any guidelines. The answer is yes, there are. Simply put, you need to do some pre- and post-processing work to fully optimize your image. We’ve previously discussed this in our top 10 raster effects. For a few more CNC design guidelines, check out our do’s and don’ts below.
![]() Pick images with high resolution. You don’t want any pixelation as it will mess up the CNC process. You should ensure that your chosen design is of a high quality.
Pick images with high resolution. You don’t want any pixelation as it will mess up the CNC process. You should ensure that your chosen design is of a high quality.
![]() Make it 5 pixels thick. The general rule of thumb for ideal conversion is a 5 pixels thick image.
Make it 5 pixels thick. The general rule of thumb for ideal conversion is a 5 pixels thick image.
![]() Choose an image using lossless compression. If you don’t know what lossless compression is or which images use it, check out our 33 supported file types.
Choose an image using lossless compression. If you don’t know what lossless compression is or which images use it, check out our 33 supported file types.
![]() Don’t use compound curves. CNC machines don’t like curves like splines or ellipses. They prefer polylines, which can only include line and arc segments.
Don’t use compound curves. CNC machines don’t like curves like splines or ellipses. They prefer polylines, which can only include line and arc segments.
![]() Check you have single cut connected paths. Pay attention to this near corner junction points and curves.
Check you have single cut connected paths. Pay attention to this near corner junction points and curves.
![]() No overlap. You don’t want any of your lines overlapping. Also, if there’s anything you don’t want in your design, delete it.
No overlap. You don’t want any of your lines overlapping. Also, if there’s anything you don’t want in your design, delete it.
![]() Beauty tips. Make sure there are no shadows and fewer colors in your design—you want a clean image to ensure the best result possible.
Beauty tips. Make sure there are no shadows and fewer colors in your design—you want a clean image to ensure the best result possible.
What Does Cut-Ready Mean?
 A cut-ready design is an image that is ready to be cut or produced with a CNC machine. Of course, that doesn’t necessarily mean that all you have to do is send it to your machine and off you go. CNC machines require a lot of fine-tuning and calibrations for different designs and materials. You need to scale the cut-ready design to an appropriate size for your CNC machine, and you need to check the cut depths, widths, and the speed of your machine.
Essentially, cut-ready designs don’t convey machine settings—you have to do this yourself. While this might sound time-consuming, it can still be a lot faster than using your own converted designs. When you create your own vectors, you have to do a lot of pre- and post-processing work. Cut-ready designs by comparison, are ready to go—all you need to do is calibrate your machine’s settings, and off you go.
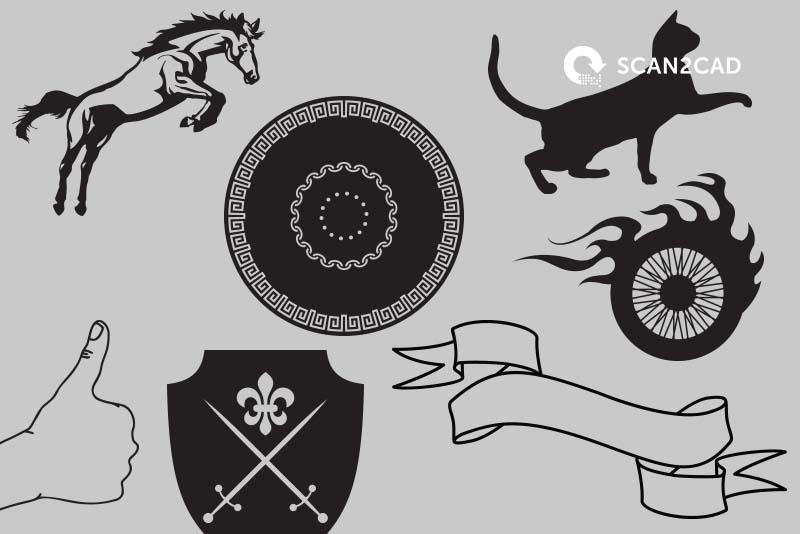
Looking for free DXF designs like the image on the right? Check out the last section below to get your own free DXF packs.
Free DXF Designs
We’ve already looked at the wide variety of websites offering free DXF designs. However, a problem with these sites is that they only really offer you a finite source—they’re only updated once a month with one or two designs. But what if you want frequent updates and new designs? Well, that’s where Scan2CAD truly shines.
Scan2CAD isn’t just a conversion software, it’s a source for everything related to CAD, CAM and CNC. It’s of no surprise therefore, that we offer our own cut-ready CNC designs that are free and ready to use with your CNC machines. And we don’t just offer one or two free DXF images. We release new DXF packs every single week—these packs typically contain 6 or 7 designs in a DXF and JPG format.
Worried they won’t be to your taste? Don’t bother. Each week brings about a new theme, so you can be sure that Scan2CAD is going to provide you with new, innovative and exciting designs. We’ve already released packs ranging from Vintage Frames to Nautical Discovery, to Birds—as you can see below.
Scan2CAD commissions a professional designer to create these DXF packs each week—just for you. These royalty-free DXF designs are created by a range of fantastic designers including Jay Madison, Ivana Todorovski and Don Ouwens.
So if you like to challenge yourself with a new project every week—this is the solution for you. Subscribe today and get a new DXF pack sent to you every single week!
