TIFF is one of the most versatile file formats around—it supports millions of colors and allows for good image quality. It’s for this reason that it’s the go-to format for many designers and engineers. Despite its many advantages, however, TIFF is still a raster file format, which may cause an abundance of issues that can be problematic, particularly in industries where precision is key. The easiest solution would be to convert TIFF to vector—opening the door to easy editing, collaboration and so on.
So, how do you convert TIFF to vector—and what does the process really entail? In Scan2CAD’s latest article, we’ll look at the relevant file types involved, the ins and outs of conversion and the types of software—not the least of which is Scan2CAD—that can be used to convert TIFF to vector.
Table of Contents
- Why convert TIFF to vector?
- TIFF
- Vector Files
- Conversion: the ins and outs
- Methods of conversion
- Convert TIFF to vector
- Scan2CAD: conversion tips
- Download Scan2CAD for free
Why convert TIFF to vector?
You might be wondering if you can just get away with using a TIFF, or why anyone would want to convert TIFF to vector at all. Essentially, it all boils down to the differences between rasters and vectors.
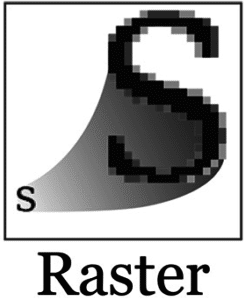 Raster images—like TIFF—are built up entirely of pixels. While this means they can hold millions of colors, it also means they’re incredibly difficult to edit. If you want to make changes to a raster image, you can’t do so to individual pixels—you’ll end up making changes to the entire image. Pixels become more apparent when you try to change the size of a raster image. Almost everyone out there, at some point, has attempted to resize an image only for it to come out blurry and undefined. This is because raster images are resolution dependent.
If you’re a designer, you’ll have had to account for these issues by creating different sizes of a raster image depending on what you’re using it for. For example, you’d need to use a different sized raster for a billboard than you would for a business card.
 Vector images aren’t built up of pixels like rasters. Instead, they’re made up of paths—relying entirely on mathematical coordinates. How does this affect scaling? It’s simple—you can change the scale of a vector as much as you want, without any degradation in quality. It’s not all about the scaling advantages, however; vectors are are also handy when it comes to editing. Unlike rasters, you can make changes to individual vector elements. Plus, you can take elements you like in a CAD drawing, for example, and re-use them in a new one. For engineers in particular, this can be incredibly useful—giving them the opportunity to take elements they like from an older drawing and using them in a newer design.
TIFF
![]()
Nowadays, you’ll see that TIFF is a popular format for “deep color” images. That is, images that hold millions of colors. You’ll struggle to find a raster format as flexible and adaptable as TIFF. As with other raster file types, TIFFs are made up of pixels. The format makes use of lossless compression. What does this mean for your image? Not only is it compressed, it also retains quality even after being edited. This is the opposite of lossy compression—a method that leads to a drop in quality after editing and saving.
If you’re looking to convert TIFF to vector, you’re in luck—you’re using Scan2CAD’s recommended file format. We often urge users to save raster images in the TIFF format because it creates the best possible vectorization result. With its lossless compression, you can rest assured that the detail of your image will be maintained. Of course, if you’re using TIFFs, you’ll have to prepare yourself for large file sizes.
Vector Files
So you know what vectors are and their advantages—not the least of which are infinite scalability, easy editing and reusability. Without further ado, we’re going to take a look at the two main vector file formats you might want to convert your TIFF to.
DXF
![]()
Compared to your TIFF image—and other rasters—DXFs tend to have a smaller file size because they don’t need to store color information for each pixel. DXFs are also made up of ASCII text. Want to know more? Check out the DXF file specification or DXF FAQs.
DWG
![]()
An important difference between DXFs and DWGs is that while the former only supports 2D objects, the latter also supports 3D elements and AutoCAD-specific elements like dynamic blocks. Additionally, DWGs tend to have a smaller file size on account of them being a binary format. If you’re working with other people who don’t have AutoCAD, you don’t have to worry—you can view DWG files without AutoCAD.
Which should I use?
There are many factors to take into consideration when decided on whether to use DXF or DWG. The main reason to use DWG is if you’re using AutoCAD or other software that can support the DWG file format. DXFs, by comparison, should be used if you’re looking to share drawings between different programs.

Conversion: the ins and outs
The process of converting a raster image to a vector is easy enough to understand. Conversion—otherwise known as vectorization—involves taking your TIFF and tracing over it to convert it to a vector. It’s possible to convert TIFF to vector through either manual or automatic tracing. You can see how the process works below…
Manual tracing
- Open your image in an image editor like Inkscape
- Draw over your image with vector lines
- This can be done with a mouse or graphics pen
- Once complete, save in a vector file format
Reasons to opt for manual tracing…
As powerful as computers are nowadays, they’re still not quite at the level of our thinking and understanding. With that in mind, you might want to manually convert TIFF to vector if you’re using a lower quality image. Imagine you have a physical architectural map. It’s slightly old and upon scanning it, the output is blurred and undefined. Now, a conversion software wouldn’t be able to tell the difference between blurred artifacts and genuine lines. You, on the other hand, would know exactly where the lines are.
Of course, you would have to take into account the length of time it might take to manually convert if you’re using a complex image to start with.
Automatic tracing
![]()
- Open your image in your chosen converter
- Choose presets according to your own preferences
- The software will detect the lines in your raster and convert them to vector entities
- You can save the image in a vector format
Reasons to opt for automatic tracing…
As we’ve said, manual tracing can be a long and strenuous process—though you’ll get a great output. Automatic tracing, by comparison, is an immensely speedy process. If you’re using software like Scan2CAD, for example, the conversion process can take mere seconds to complete. While you aren’t getting the human understanding that comes with manual tracing, you should bear in mind that a lot of vectorization software out there is improving with each passing year. With image settings and OCR technology, automatic tracing is slowly catching up.
While you can work with images of any quality in manual tracing, you’ll only be able to convert high-quality images with automatic tracing. If you do use low quality images, odds are, you’ll have to put in some manual work.
Methods of conversion
Image editors
While these editors will give you a good enough output for design purposes, you might find them lacking when you’re looking for ultimate precision. They won’t be able to give you a specialized conversion for your technical drawings.
Online converters
So, you’ve not got an image editor, or you don’t feel it will give you the best output when you convert TIFF to vector. Your next step might be to find an online converter. While you won’t struggle to find an online converter—there are hundreds out there—you will struggle to get a good output.
Online converters come with an abundance of disadvantages. You’re looking at image size limits, issues with converting text and limited capabilities overall. At best, you’d get a poor quality output for your troubles. And that’s not all—one of the biggest concerns with online converters is in regards to security. Once you’ve converted your image online, you’ll have to download it. There’s no telling how trustworthy a converter is. For all you know, you could be downloading a virus. It’s just not worth it.
Other methods…
Any designer or engineer worth their salt will want to convert TIFF to vector using a specialized solution. Whether you’re converting architectural plans, contour maps or other technical drawings, you need ultimate precision to ensure you get the best possible output. In fields like design and engineering, you’re often collaborating with several people at any given time—you don’t want to have to go back to the drawing board just because you ended up using a badly converted vector.
This is where Scan2CAD comes in…
Convert TIFF to Vector using Scan2CAD
Scan2CAD is a market leading raster-to-vector conversion software, specializing in—yes, you guessed it—the conversion of technical drawings to vectors. With a wide range of supported file types, you can easily convert TIFF to vector file types like DWG and DXF.
Scan2CAD works by automatically detecting the lines, curves and text present in your image. Then, it traces over these entities with vector lines and text. Scan2CAD boasts an exceptionally speedy vectorization process—taking mere seconds in some cases. All you’ve got to do is load your image into Scan2CAD, pick your vectorization settings and off you go! See what this looks like in the GIF below…
Converting a technical drawing to vector with Scan2CAD
There are, of course, some limitations to automatic conversion—all dependent upon what type of image you’re using, what conversion you’re looking for and much more. As such, Scan2CAD has specific conversion tips you should bear in mind to ensure you get the possible output.
Scan2CAD conversion tips
Pick your image carefully…
While this might sound obvious, you should take care to pick the right kind of image to convert. If you’ve got a grainy, blurry image, you won’t get a good vectorization output—no matter how good Scan2CAD is. You’re starting off well enough, however, by choosing to convert TIFF to vector. TIFFs are the perfect file format to convert—offering high resolution and lossless compression. There are of course, a few other things you need to consider.
When picking your image, try to avoid ones that contain blurred areas, overlapping elements or pixelation. It’s also recommended that you avoid using images with too many colors. If you can, stick to black and white images. This makes it much easier for the software to detect the lines and shapes in your image.
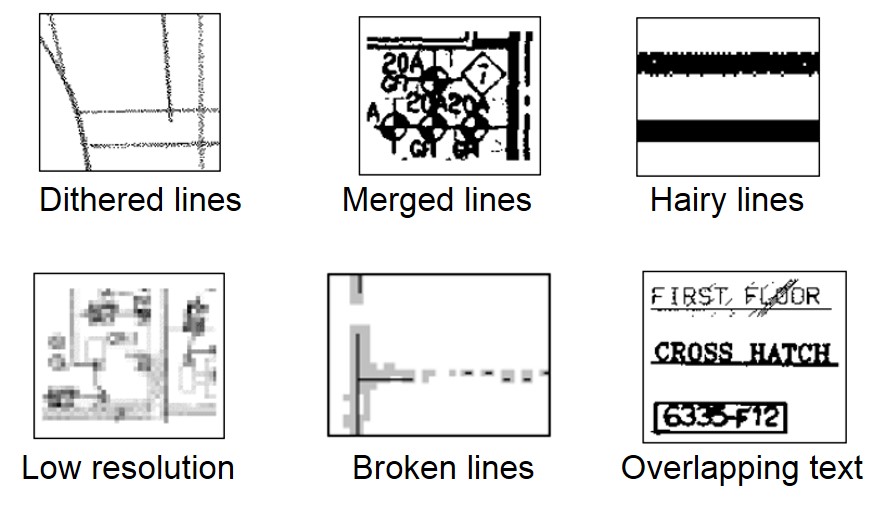
Don’t bother converting any raster image that sports any of these problems…
Use Scan2CAD’s editing tools…
Scan2CAD understands that there isn’t a simple one-size-fits-all solution when it comes to converting rasters to vectors. Some raster images require more clean-up than others before and after conversion. It’s for this reason that we offer a thorough raster and vector editing suite to ensure users get the best possible vector output. We’ve got a variety of raster effects to take advantage of, including:
- Thresholding. This tool is used for reducing the number of colors in your image to just black and white. With it, pixels are divided into black and white—so you don’t have to worry about grayscale or compression artifacts. You can apply it to the entire image (simple) or different parts (adaptive).
- Remove speckles/holes. Even if you’re picky with your TIFF, odds are it won’t be perfect. If your image suffers from stray pixels or gaps, you can erase and fill in holes to ensure your image contains only solid objects.
- Thicken lines. Got a TIFF filled with gaps and broken lines? Thickening the lines in your image will fill in gaps easily enough. Use it with caution—you don’t want to end up joining up lines that are meant to be separate!
- Smooth. Complete the clean-up process with a nice, smooth finish. The smooth tool, as the name suggests, smooths out any hairy edges your TIFF might have. This stops Scan2CAD from assuming the ‘hairs’ are part of the image and tracing them.
Download Scan2CAD for free
Precision is key, which is why Scan2CAD is the ultimate solution for designers and engineers when it comes to conversion. Whether you’re looking to convert TIFF or any other raster to vector, Scan2CAD should be your first choice. We offer a specialized conversion using superior vectorization settings.
And with our range of pre- and post-conversion editing tools, you can ensure you get a perfect vector output with every conversion. Ever struggled with converting raster text to vector text? Scan2CAD offers Smart OCR—meaning it can be trained to understand unusual fonts, including handwritten text. The cherry on top of the cake has to be Scan2CAD’s batch conversion tool—allowing users to convert hundreds of files.
We could spend hours explaining why Scan2CAD is the perfect solution for designers and engineers. Instead of wasting your time, however, we’ll leave you with our free, 14-day trial. You can enjoy everything Scan2CAD has to offer with no limitations or obligations. Simply click on the link below to get started!