
If you’re looking to create vector representations of your raster images—whether architectural drawings or electrical plans—you have to make use of image tracing. This process is the only way to vectorize your drawings so that they’re ready for use in CAD software. As we’ve shown previously, there are two ways to go about tracing an image: manual tracing or automatic conversion. To help you figure out which method is more economical, we’ve compiled a manual and automatic trace cost comparison.
Our guide will take you through the intricacies of tracing, looking at how each process works—measuring up the cost and man hours of each method. We’ll even answer the all-important question: which method is the most cost-effective?
Table of Contents
Tracing 101
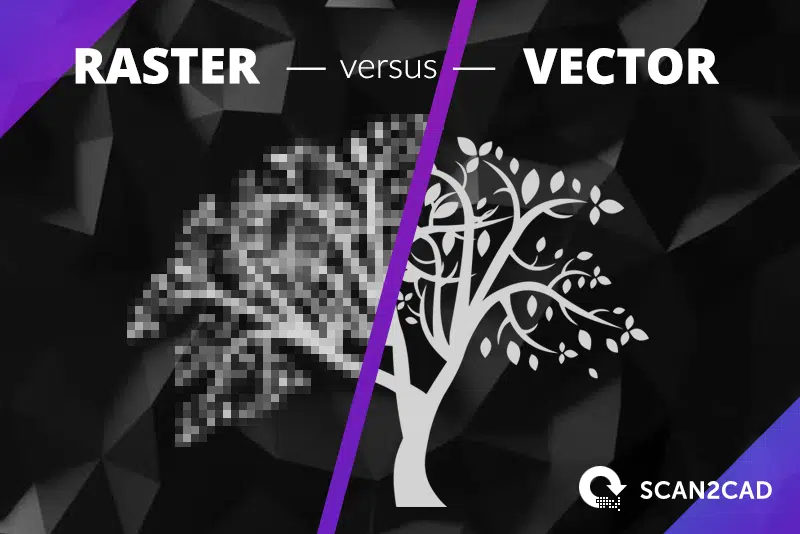
Image tracing—otherwise known as vectorization—is the process in which we trace over a raster image in order to create a vector. There are two methods to this process: manual tracing or automatic conversion. We’ll look more closely at how these two methods work—and what types of software you can use to do so—further below. Firstly, however, we’re going to run through the reasons as to why we need to vectorize images or drawings in the first place.
Rasters…
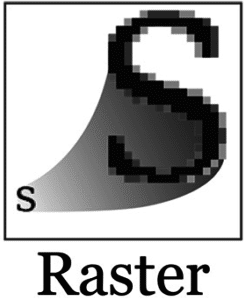 It’s practically impossible to browse the internet or your favorite social media platform without encountering a raster image. In fact, you’re using raster images without even realizing it—from the photographs you share on Facebook to the GIFs that you send to your friends. Incredibly easy to share and store online, it’s no surprise that rasters are so popular in web graphics and photography.
While rasters do come with advantages—holding incredible detail and millions of colors—they’re not always ideal. Made up of colored pixels, raster images have no real structure—you can’t even edit the individual pixels. Additionally, pixels ensure that raster images can only be displayed at a set resolution. To attempt to change the scale—or zoom in—would result in a major loss of quality. The inability to attach information to rasters further renders them useless for CAD.
Vectors…
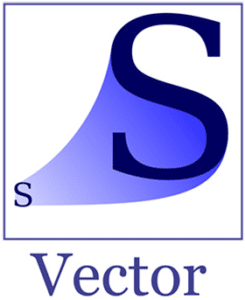 If rasters are the preferred file format for photographers, vectors are the preferred format for designers and engineers. Not only are vectors devoid of the many issues that plague rasters, they also come with a range of benefits—not the least of which includes a compatibility with CAD software.
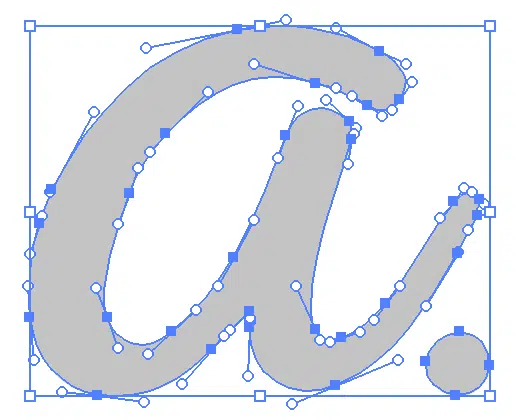
Vector images use an entirely different method to storing image data. Instead of using pixels—inheriting their abundance of issues—they use objects. A vector will display the individual elements of an image. Examples of elements include—but aren’t limited to—lines, curves, shapes and text. And that’s not all that makes vectors so different to rasters. Each object that’s displayed in a vector is defined by mathematical coordinates—meaning you can view a vector at any scale without any loss in quality. To put it simply, vectors are infinitely scalable.
Whilst you can’t edit individual pixels in a raster image, you can quite easily make edits to the individual elements within a vector image. This ability is particularly useful when it comes to working with your vector drawings in CAD software. Not only can you edit and reuse elements, you can also attach data to them—specifying material, size and dimension.
Why is conversion necessary?
If you’re working in industries like graphic design, you’re relying on artwork and designs that are of a high quality. Raster images—while detailed—are resolution dependent. Let’s say that you’re using a single logo multiple times on your website. If you need the logo in different sizes, you’ll have to create multiple versions of your raster logo—you can’t just resize and hope for the best. If you convert your raster designs to vector instead, however, you can use the same vector logo for any purpose. It doesn’t matter if you’re using it as a tiny icon or a huge wallpaper design—it’s infinitely scalable.
The more prevalent use for conversion—tracing, or vectorization—is for CAD and CNC. As we’ve said, raster images aren’t compatible with CAD software—or CNC for that matter. For example, if you’ve scanned a hard copy architectural drawing, you won’t be able to use the digital raster copy directly in CAD. You can, however, convert your scanned drawing ready for use in CAD—and later CNC if you so wish.
Manual tracing
How it works
- In an image editor, use your mouse to trace over your drawing with vector entities
- Use a tablet and graphics pen to physically trace over your image
Many drafters opt for manual tracing for a more “hands on” experience. While it does give a drafter ultimate control over the tracing process, it also requires them to have a lot of skill and patience to do so. This control however, plays into one of the biggest benefits of manual tracing—human understanding. When you’re working with older, dated drawings, you have the advantage of understanding where you should be tracing.
Of course, it’s not all sunshine and rainbows when it comes to manual tracing. Sit back for a moment and try to think about how long it would take you to physically trace over one of your architectural plans or contour maps. Manual tracing can be an incredibly long process depending on your experience, skill and choice of image editing software. And, while you might have a great understanding, your spatial accuracy won’t ever measure up to some automatic converters.
Automatic tracing
How it works
Whilst manual tracing offers a more hands-on approach, automatic tracing takes it completely out of your hands. You’ll start by scanning your drawing and opening the subsequent raster image into a conversion software package. The software will detect the lines, shapes and text present in your image—drawing over them with vector entities. By the end, you’ll have a vector image.
Automatic tracing with Scan2CAD
One of the biggest disadvantages to manual tracing is how time consuming it can be. With the right conversion software, however, you could convert your raster in minutes. If you’ve got a heavy workload, or you’re a freelancer looking to complete as much work as possible, this is extremely beneficial. If you’re using the right software, it doesn’t even matter what types of drawings you’re converting—whether they’re mechanical plans or CNC profiles.
That being said, automatic conversion isn’t without its flaws. In almost all cases, you will have to put in some manual work. You have to ensure the image you’re converting is of the highest quality, and you’ll have to make some minor tweaks to ensure you get the best possible vector output.
To figure out which method is more effective—in regards to cost and time—we’ve put together a manual and automatic trace cost comparison below.
Cost comparison
Now that we’ve explained how each process works, we’re going to look at which method is most cost-effective. Is it cheaper—and easier—to get a professional drafter to convert your drawings to CAD for you? Or are you better off trying it yourself manually or with an automatic converter? Don’t worry—we’ve got all the answers for you below!
Manual tracing
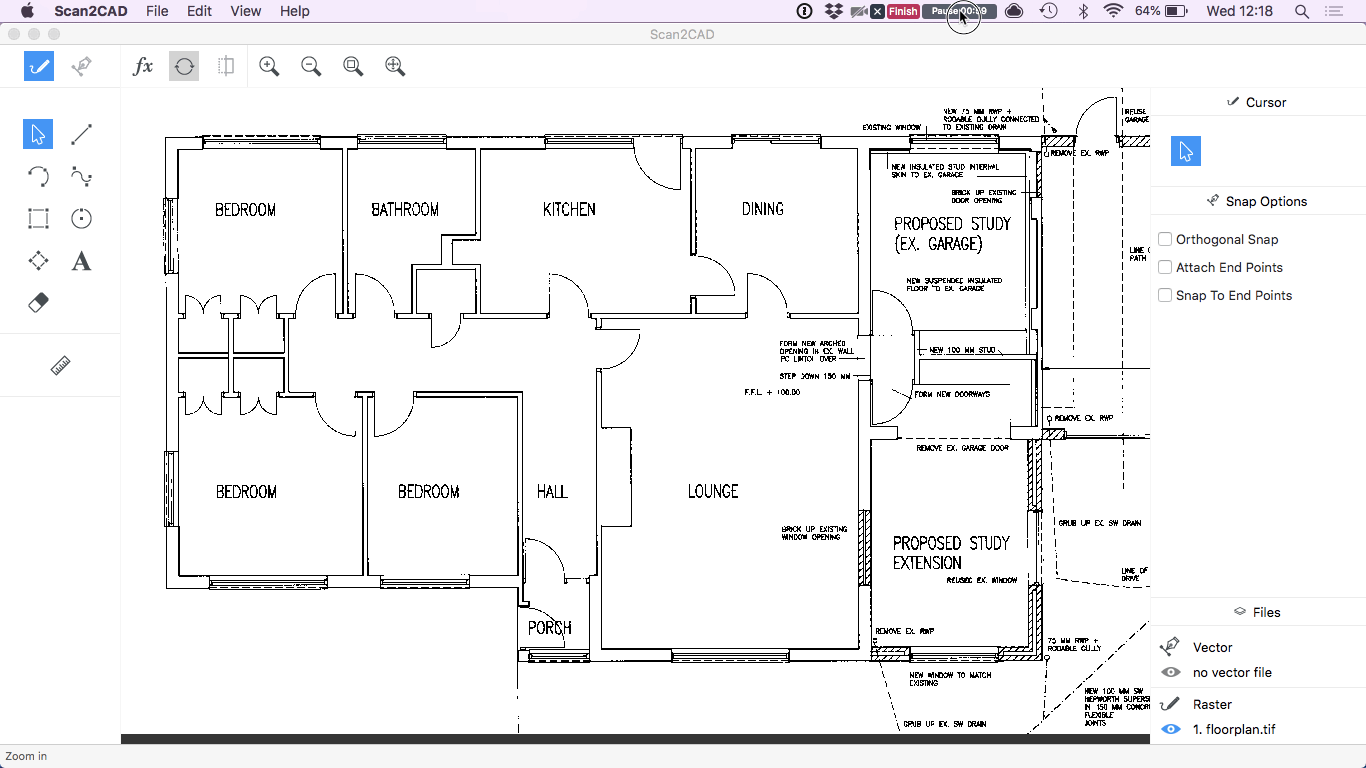
Professional drafters use a variety of software—ranging from AutoCAD to SolidWorks—to convert the designs of engineers or architects into technical drawings. They also make use of manual tracing to convert hard-copy and digital drawings to vectors, ready for use in CAD. To help you get a better idea of how much time it would take a drafter to trace your drawings, we’ve put together a video below. It’s a brief snippet showing the process of manually tracing an architectural plan using Scan2CAD.
In the video, we made use of Scan2CAD’s variety of tools to trace over our architectural plan. In this case, we use vector lines to trace over it, much like you would with tracing paper. Now, the time taken to manually trace a drawing varies depending on a variety of factors including:
- Your level of experience
- The software you’re using
- How complex the drawing is
The manual trace shown in the video above would take anywhere between 5 to 10 hours. If you’re using other software, like Inkscape or Illustrator, you’re looking at an even longer process. So, how much would it cost you to get a drafter to do this process for you?
The cost and man-hours
The median salary for drafters in the US in 2017 stood at $54,170 according to the BLS—that’s $26.04 per hour. So how much would it cost for the a drafter to trace the drawing in the above video? The speed with which a drafter converts your drawing will vary depending on their experience and level of expertise. Let’s assume the worst and say that it will take them 10 hours—that’s $260.40 if we’re going by an hourly rate. Alternatively, assuming they can get it done quickly and closer to the 5 hour mark, it will set you back $130.
Looking at online CAD drafting services, the price varies. We see quotes of $125 ranging from to $640 for the same sized drawing. But these quotes will of course increase depending on such factors as image quality, complexity, the nature of the elements in the drawings and so-on.
What if I do it myself?
If you’re put off by the cost of getting a professional to manually trace your drawings for you, you might want to look into doing it yourself. Ultimately, it all depends on how much time and money you’ve got to dedicate to your projects.
Beware of using generic graphic design software (such as Inkscape , Adobe Illustrator and CorelDRAW ) for tracing technical drawings these appications are not designed for CAD/CAM requirements and although they may support such files as DXF, they do not support the types of data and vector elements required for CAD/CAM.
Don’t forget to weigh up the man-hours involved. Depending on your experience, chosen software and the complexity of your design, it could easily take over 10 hours to manually trace your drawing. If you’re doing that with dozens of drawings in a month, is it really cost-effective?
If you’re working towards tight deadlines and you’ve got a steady stream of drawings to convert to CAD, we’d definitely recommend avoiding manual tracing. In fact, we’d even avoid outsourcing CAD conversion and advise you do it yourself via automatic tracing.
Automatic tracing
As we’ve said, manual tracing has its advantages and disadvantages. One thing’s for sure, however: unless you’re willing to spend a lot of time and money on your conversions, automatic tracing might be your best bet. To give you an idea of what you can expect, we’ve included an excerpt of us automatically tracing the same architectural plan as above in Scan2CAD.
With just the click of a few buttons, the entire vectorization process took mere seconds to complete. Of course, taking into account the time taken to manually tweak the image before and after conversion, you’re looking at 1 to 2 hours of work overall.
The cost and man-hours
So how much would it cost you to buy a conversion software package that will do most of the work for you? As we’ve said, there are image editors that offer automatic tracing, such as CorelDRAW and lllustrator but these are not suitable for CAD/CAM & CNC requirements. If you’re going to the effort of looking at a cost comparison of manual and automatic tracing, then you’ll want to use something worth your time and money.
Specialized conversion software packages might seem costly at first. Take Scan2CAD, for example. This market-leading conversion software package—which we’ll look further into below—can be purchased on a monthly or annual basis.
Let’s look at why these pricing options would save you so much time and money over any other option. Taking the examples above in the manual tracing section, you’re looking at an average price of around $130-$260 for each converted drawing, depending on where you go. If you’re in the market to convert large, complex technical drawings, you’re probably looking at the higher tier of expense which is $260+.
So which is best?
If you’re only converting the occasional drawing to CAD, you could probably get by with paying a drafter to do the work for you. If you’ve got enough time on your hands, you could even get away with doing it yourself. It’s a great way to build up your drafting experience after all, and who knows your drawings better than you? And if you already have software like AutoCAD or Illustrator that enables you to manually trace your drawings, you don’t have to spend any additional money.
Of course, this all changes when you throw deadlines and heavy workloads into the mix. If you’re looking at converting hundreds of drawings in the space of a year, manual tracing really isn’t an option. Even if you’re only converting a handful of drawings per month, it’s still a heavy expense—particularly if you want it done quickly and efficiently.
Automatic tracing—done using the right kind of software—can speed up your entire workflow and save you money. If you’re a freelance drafter, it would enable you to take on more clients and complete more work than ever before. You can even use a combination of manual tracing with an automatic converter—tracing your drawings by hand, scanning and converting the subsequent raster image.
