
However, saving your vector graphics and text in PDF format locks them and makes them uneditable. To make further edits to these vectors, you’ll have to convert the PDF to a DXF file – but sometimes you might encounter some problems along the way. So, we’ve put together a list of 5 top hacks that you can use to make the conversion process quicker and easier – and get the best possible results.
Hack #1. Improve your Scanning Technique
Vectorization allows you to convert a scanned image into editable vectors. However, if you don’t scan your image correctly to begin with, you could end up running into problems further down the line. Here’s a handy checklist to help you make sure you’re following the right steps while scanning your image – and help you avoid many common problems encountered during vectorization.
- Choose the correct color setting on your scanner – If you’re scanning a black and white image or drawing, never select the color option. It’s easy to do this by accident as most scanners’ default setting is to scan images in color. Scanning with the monochrome setting will produce a cleaner image containing only two colors – black and white. It’s also important to remember the difference between grayscale and monochrome – grayscale images contain 256 shades of gray, meaning they’re also unsuitable for vectorization.
- Adjust the threshold of your image – If you’re scanning a black and white image or drawing, never select the color option. It’s easy to do this by accident as most scanners’ default setting is to scan images in color. Scanning with the monochrome setting will produce a cleaner image containing only two colors – black and white. It’s also important to remember the differerence between grayscale and monochrome – grayscale images contain 256 shades of gray, meaning they’re also unsuitable for vectorization.
Check out the difference threshold levels makes to your image! You can include as much or as little detail as you want.
- Save your images using TIFF or BMP file format – JPEG and GIF may be common formats, but they’re also lossy file types, meaning they compromise image quality for lower file sizes. Not only that, but they’re also unsuitable for black and white drawings. Saving in a lossless format means better image quality.
- Align the image well – No one wants to spend hours fixing skewed lines. Worse still, using deskewing tools on your image often severely degrades its quality. Avoid these problems by getting image alignment right first time.
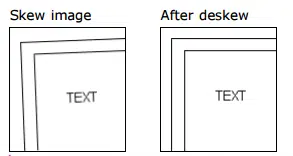
Using the Deskewing tool on very skewed images usually results in a significant loss of quality, so best to avoid that!
Hack #2. Scroll Around the Image Using Keyboard Shortcuts
Here’s my favourite hack. When vectorizing an image, you’ll usually have to zoom into it very closely – either before conversion, to clean the image up, or after conversion, to make sure every element is converted as desired. Here are some keyboard shortcuts that make it easy!
- Press F to fill the entire workspace with your image. After zooming in, the screen would be covered in gray area and that’s such a waste of screen space!
- Press Ctrl + Right arrow (→) to move one screen to the right.
- Once you’ve moved all the way across the image horizontally, press Ctrl + Down arrow (↓) to move one screen
- Then, press Ctrl + Left arrow (←) to move one screen to the left.
- Continue with this process until you’ve moved across your entire drawing.
There you have it! A neat and easy way to make sure you’ve checked every part of your drawing, without missing a spot.
Hack #3. Type Over Poor-Quality Text
Ever received a drawing with unusual fonts or handwritten notes? While OCR text recognition can sometimes detect the letters and successfully convert them to vector text, other times it will just convert them into lines and arcs. It can be faster to simply type over it before using the Erase Area tool to get rid of any hard-to-vectorize text.
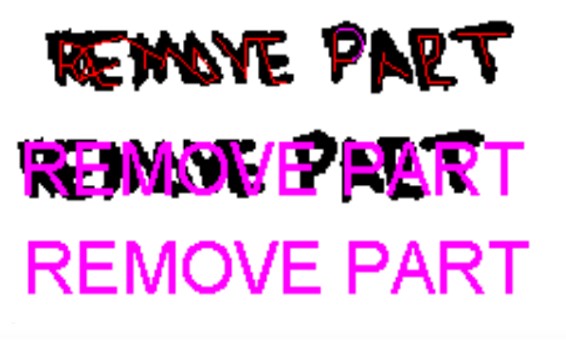
OCR technology cannot detect handwritten text well, so it might be quicker to type over!
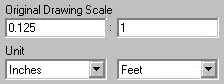
Hack #4. Save it in the Correct Scale
Hack #5. Convert Multiple PDF Files at the Same Time
If you’re an AutoCAD user, you may want to convert to DWG instead. Learn more in our ultimate guide to PDF-to-DWG conversion.
