Anyone working with CAD knows that learning how to vectorize an image can make your life so much easier. Whether you’re designing, sharing or editing an image, vector file formats are (more often than not) going to be the best option to ensure your work is the best it can be. With this in mind, we’ve put together a handy guide that covers everything you could possibly need to know about vectorizing images.
Table of Contents
- What is vectorization?
- Common vector formats
- Why vectorize an image?
- How does vectorization work?
- Pre-vectorization
- Post-vectorization
What is vectorization?
Vectorization refers to the process of converting an image to a vector format. While raster files are made up of pixels, vector images are made up of a collection of individual objects. These objects may be in the form of arcs, lines, text, etc. Each one is defined by a mathematical equation. This means that even if you zoom in on the image or re-scale it, the quality will not be compromised.
The same cannot be said for raster files. Zooming in or resizing an image stored in a raster format will result in pixelation—thus, the quality will suffer. As a result of these kinds of drawbacks, people looking to create, share and edit designs with CAD software will need to vectorize their raster images.
Common vector formats
DXF

Thanks to these benefits, DXF has become the standard file format for data exchange within CAD. Industries across the globe are able to successfully collaborate on projects without being restricted to a single type of CAD software. We highly recommend using DXF files if you’re looking to be able to share your designs.
DWG

DWG stand for ‘drawing‘, with both 2D and 3D images being supported. As you can probably guess, the downside to this file type is that not all programs (especially those not made by Autodesk) will be able to access DWG files. It’s still not the end of the world if you find yourself needing to open DWG files and you don’t have the native software. While you might not be able to edit the images, there are ways you can at least view DWG files without AutoCAD.
SVG
 Standing for Scalable Vector Graphics, this vector format is—you guessed it!—particularly useful if you’re going to be re-scaling your designs.
What separates SVG from other vector files, like DXF and DWG, is the fact that SVGs are suited primarily for use on the web, rather than with CAD. Practically all web browsers support this format. Plus, it’s easy to embed SVG images into web pages, making them a great replacement for raster images in this realm.
Why vectorize an image?
Raster vs vector
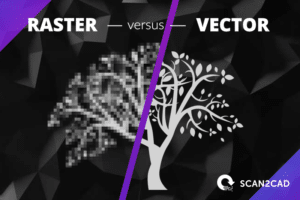
While raster and vector formats can both be useful in their own ways, vector images are a necessary choice if you’re looking to use your designs in a CAD context. We’ve already touched on the quality issues that come with re-scaling images that are a collection of pixels—and that’s not where the issues end.
Raster images need to store color information for every single pixel, resulting in the file sizes being fairly hefty. This isn’t ideal in terms of computer storage. You also might not be very popular with the colleagues you share designs with, as you’ll be forcing them to download large files.
Raster images can still be of a high quality and are useful for those working in roles involving digital photography or web design. Additionally, despite their large size, most standard image editing software supports raster files, so they can be useful for sharing and storing images. However, if you need to edit individual elements within your image, or make it compatible with CNC software, vectorization is the way to go.
Common raster formats
For use with CAD
The major advantage to vectorizing an image is that they can then be easily edited with CAD or CNC software. Remember those individual elements we referred to earlier? Well, each one can be recognized by CAD software and edited separately. This means that, whether you’re dealing with lines, paths or curves, each can be tweaked without making changes to the rest of the image. Every object is designated its own mathematical formula, allowing for a significant level of precision in the editing process.
As we’ve already mentioned, while you’re editing a design, you can zoom in and out of the image to your heart’s content, without the overall quality being affected. This is not the case with raster images—designs cannot be edited pixel by pixel and zooming or rescaling can leave you looking at a blurry image. As a result, if you’re looking to use your images in CAD, vector formats are certainly the way to go.
How does vectorization work?
In order to vectorize an image, the original raster version must be traced. This can be done either manually (by hand), or automatically (by a computer).
Let’s look at the pros and cons of each option…
Manual tracing
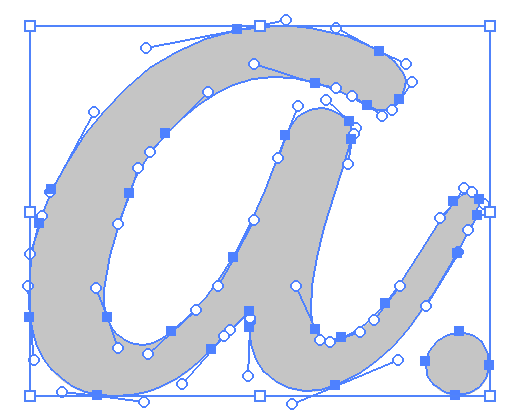
Carrying out the tracing yourself means you can closely control the entire process. Computers might be very clever, but they are yet to be able to recognise small details in images as accurately as the human eye. Doing it yourself is therefore the better option if your image is low quality, as you’ll be able to pick up details that may be missed by vectorization software. Converting an image through manual tracing can also be an interesting (if you’re a design enthusiast) and rewarding journey. You’ll be improving your skills and no doubt learning new things along the way.
On the other hand, be careful not to be too ambitious. Unless you’re a professional tracer, the manual approach should only be attempted if the image you’re working with is fairly simple. Otherwise, vectorizing the image could turn out to be an incredibly time-consuming and burdensome task. Be prepared for what you’re setting yourself up for!
Automatic tracing
If you don’t fancy doing all the work yourself, there’s a range of software out there that can automatically trace the image for you. Once your work has been opened with a conversion program, the technology is able to detect the features of your raster image and trace over them with vector entities. Thanks to constantly improving technology, many programs can now produce highly professional results in an amazingly short amount of time.
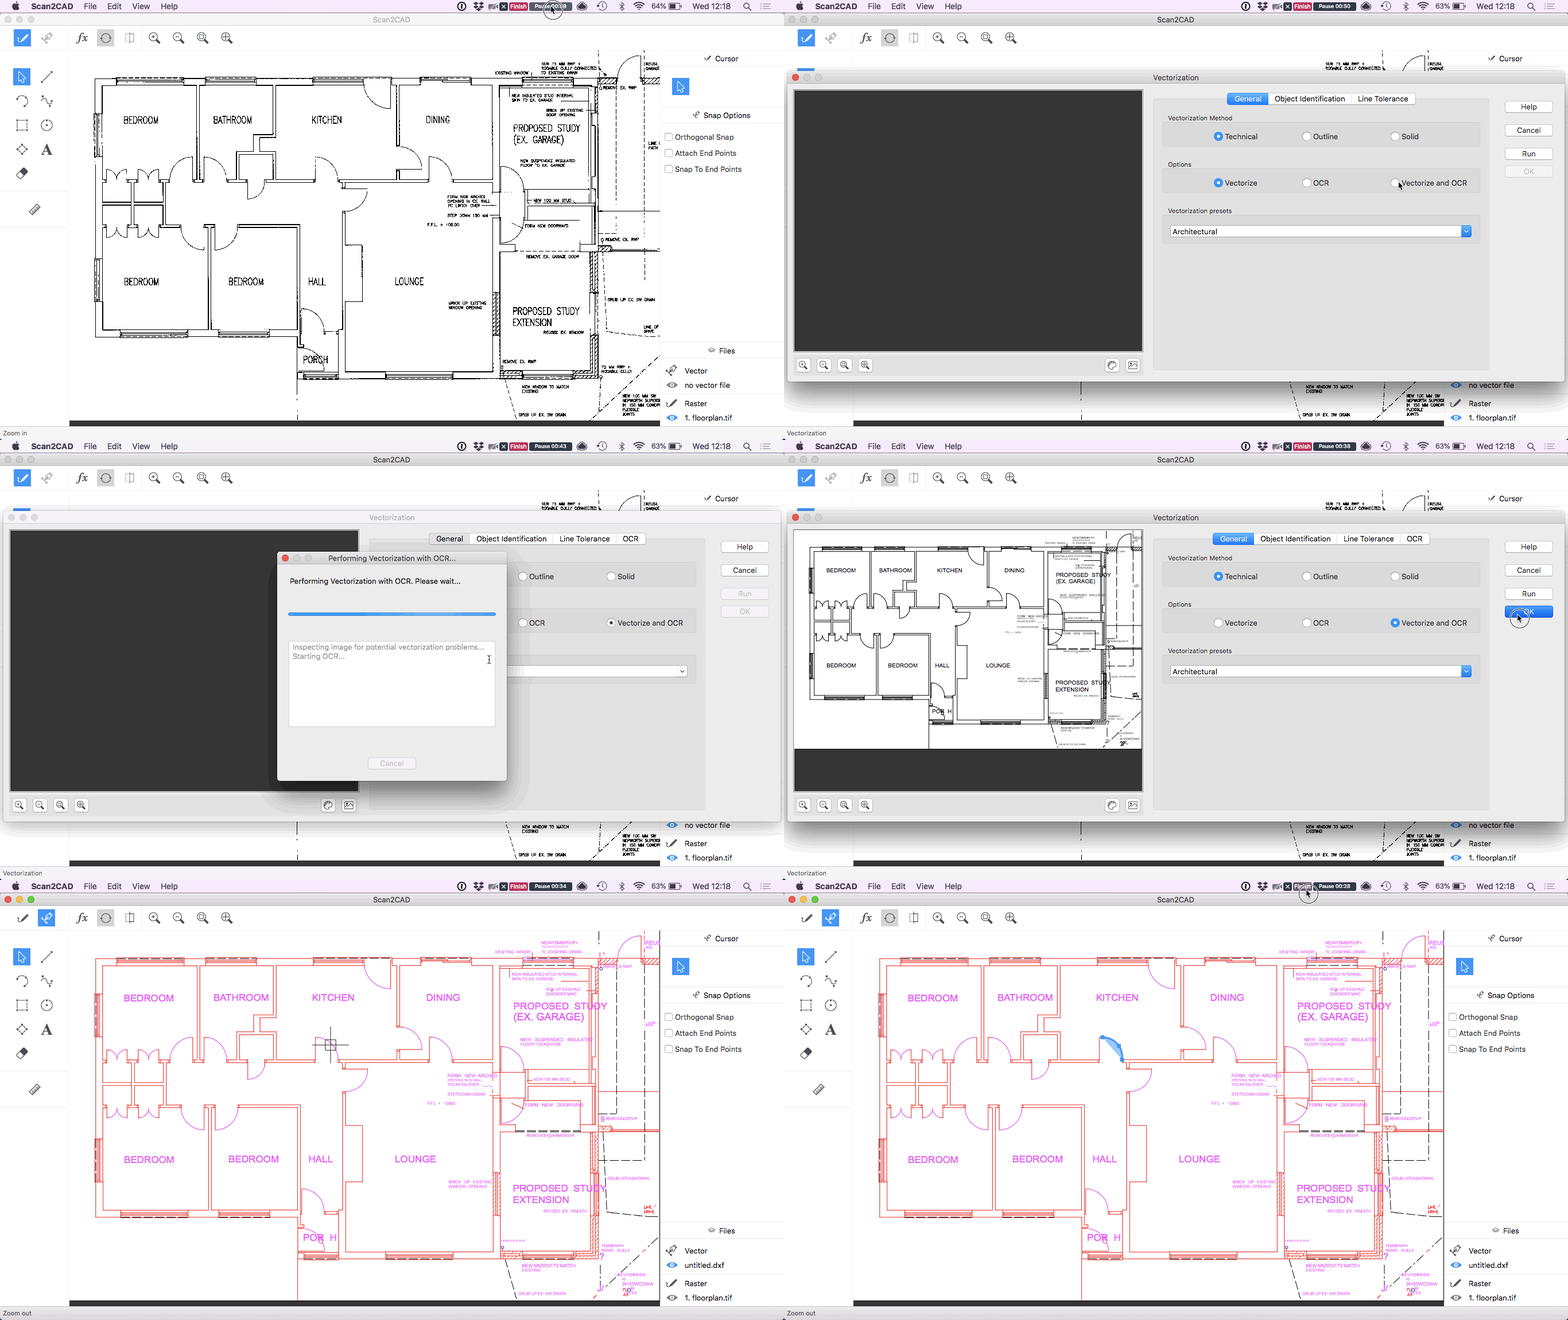
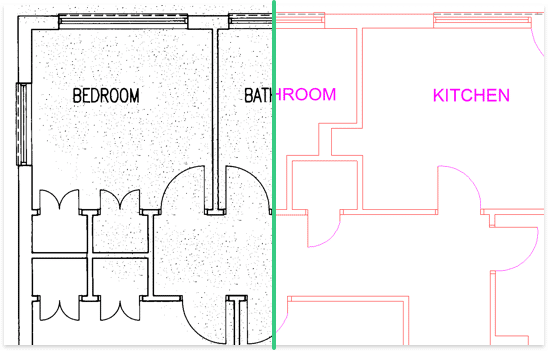
Automatically tracing a technical drawing floorplan using Scan2CAD
Take Scan2CAD, for example. Our software makes the conversion process quick and easy. Open your raster image in Scan2CAD, run vectorization and export the image to your chosen vector format.
In a matter of seconds you’ll have a professional vector image with which to work. To have a go at this yourself, download the free trial below.
Despite the obvious convenience of automatic tracing, you will need to make sure that your original raster image is appropriate and optimized for the conversion process. In other words, you should ‘clean‘ the image.
Pre-vectorization
Clean up for optimal results
Once you’ve decided to vectorize an image, there’s a couple of steps you need to take before actually starting the process. In order to achieve the best results possible, make sure your raster image is of a high quality before conversion. Ensure you do this even if you think your original image is fine—there are often flaws that you won’t notice at first glance.
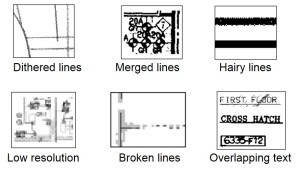
Beware of these common image problems.
There are a few different steps you can take to clean up an image to make it suitable for conversion. These include altering the color depth, smoothing or thickening lines, and ensuring any holes are removed. For a thorough description of what each of these steps involve, and others you should take, consult Scan2CAD’s raster quality checklist.
Be aware that if your original image is broken, fuzzy, or contains overlaid information, it is unlikely to be suitable for vectorization. If you notice any of these features, select a new starting image before wasting any time attempting to vectorize.
Once your chosen image is as clean as you can make it, you’re good to go!
Post-vectorization
Now that you have professional standard vector images to play with, you can get to work making the most of your designs! But how to start? Well, when it comes to CAD, you have a wide range of software options. Consult the following table to learn more about some of the top names in the industry.
CAD software options

