Most designers and construction professionals know that the PDF format is convenient for its ease of handling. But when it’s all you have to work with as reference material for new projects, things start to get a bit more difficult. The same goes for scanned versions of physical plans and schematics. Converting these PDFs into editable vector files is a common first step in most major construction and design workflows. Most professionals resort to redrawing the whole thing, but that takes up time and resources that don’t need to be wasted if we work a bit more efficiently. This is where PDF conversion tools come in handy. Today, we’ll be taking a look at how Scan2CAD can easily convert PDF to DXF files.
Table of Contents
Raster PDF vs. Vector PDF

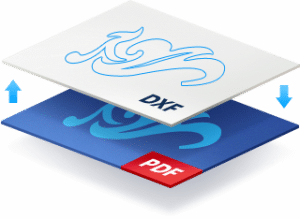
Vector images compared to raster images
Let’s first go over the two main types of PDF files you’ll commonly be dealing with – raster PDFs and vector PDFs.
Raster files are images formed by colored pixels clustered together. Vector files, on the other hand, are made from “paths” – geometric elements with information dictating various characteristics such as curvature, line weight, color, and length.
We can imagine two versions of a Venn diagram image – a raster version and a vector version. The raster version will be made of pixels clustered together to create a portrayal of two interesting circles with the colors of the clustered pixels dictating the color or the diagram parts. The vector version will be made of data dictating the diameters of the circles, the colors of the circles, and the color of their intersecting area.
For most purposes related to CAD work, it is easier and more accurate to work with vector files. Raster files, depending on their resolution or quality, will sometimes be blurry and inaccurate. Vector files have set values and will readily be editable when converted into a format that your preferred CAD software can work with. So if you’re trying to convert PDF to DXF, always opt to get vector versions of the source file when you can.
Working with a raster PDF
Step 1: Open up the raster PDF.
Click “File” on the top-left corner of the Scan2CAD interface and then select “Open”. Navigate to the PDF file you need to convert on the dialog box that opens up. Click on “Open” after you’ve selected the file.
In the dialog box that follows, you can double-check if the PDF has vector or raster elements. Do note that you’ll have to work on one page of the PDF at a time.
Step 2: Clean up the image.
Click on the “Clean image” tool at the toolbar on the top of the interface. It’s the one shaped like three stars.
In the dialog box that opens up, there are various tools you can use to tidy up the image before conversion. The most important one is the Threshold tool which turns the vector PDF into a black and white image suitable for conversion.
Click on “OK” once you’re done with the edits.
There are various tools you can play around with at the left side of the screen if you want to erase, add, or edit raster elements before you convert them.
Step 3: Convert the image.

Once you’re happy with the cleanup and edits you’ve done, it’s time to move on to the actual conversion step.
Click on the Convert tool next to the Clean image tool and a dialog box will pop up.
There are a bunch of tools you can play around with here, but for most technical drawings, all you have to focus on are the Vectorization method, Options, Vectorization presets, and OCR tab.
Set the Vectorization method to Technical if you’re working with a technical document, set the options to Vectorize and OCR if you want the conversion process to try and convert the raster text in the document to editable TrueType, and tweak the OCR settings according to the text characters in the PDF.
Click on “Run” to perform the conversion and see a preview on the left part of the dialog box. If you’re happy with that preview, click on “OK” to finalize it.
Step 4: Save the image.
From here, you can choose to do some minor vector edits with the tools on the left side of the image, but for any major edits, you’ll want to use your preferred dedicated CAD software.
Just save the converted vector by once again clicking on “File”, then Save as > Vector. In the dialog box that pops up, navigate to where you want to save the file, type in its name, and choose the file format you want to save it as. For most modern CAD software, you’ll want to convert PDF to DXF since DXF is a common file format most programs can handle. Click on “Save” once all of that is done.
Working with a vector PDF
Step 1: Open up the raster PDF.
This part is exactly the same as with a raster PDF. Click on “File” on the top-left corner of the Scan2CAD interface and then select “Open”. Navigate to the PDF file you need to convert on the dialog box that opens up. Click on “Open” after you’ve selected the file.
In the dialog box that follows, you can double-check if the PDF has vector or raster elements. Do note that you’ll have to work on one page of the PDF at a time.
Vector PDF’s have an extra dialog that pops up to let you optimize the vector elements in the PDF before opening it up on Scan2CAD. It’s usually best to leave it at its default settings, but feel free to play around with the Vector Optimization settings at your discretion. You can also access the tool again later on under the Convert sub-menu on the top part of the screen.
Step 2: Save the image.
Since the image is already vector, there’s no need to clean the image nor to convert it. Like with raster PDFs, you can choose to do some minor vector edits with the tools on the left side of the image. But again, for any major edits, you’ll want to use your preferred dedicated CAD software.
Just save the vector by clicking on “File”, then Save as > Vector. In the dialog box that pops up, navigate to where you want to save the file, type in its name, and choose the file format you want to save it as. If the goal was to open it up on your preferred CAD software by converting the PDF to DXF, choose the DXF format. DWG formats also work almost just as well. Click on “Save” once all of that is done.
So that’s the whole process. If it’s a fairly simple image, this won’t take users more than a minute to execute. There are a lot more things you can do with Scan2CAD and you can take a look at all our available video tutorials.


