
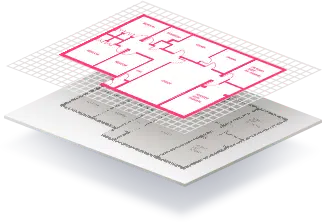
1. Change your raster image’s resolution
The rule of thumb is that lines should be 4-5 pixels thick. You can zoom into your image to check. For best results, we recommend an image resolution of at least 300 dpi. If your image has a particularly low DPI you can increase the scale in Scan2CAD (by clicking Raster Effects > Scale).
2. Reduce colors
In an ideal world, all images that you’re converting to vector would be monocolor (black and white). This gives you the clearest possible contrast between the background (typically white) and the foreground (typically black – these being the elements you wish to vectorize).
Commonly, however, even an image that appears black and white may be formed of hundreds of colors on the grayscale.
Reducing colors is important because a conversion engine will detect every shade as a separate region in the image. Therefore, if you converted an image with complex colors into vector then you will have a large number of separate vector entities in your image, rather than smooth, solid lines, text, and polygons.
Of course, it is common that you wish to keep multiple colors in your image (for example, maps containing several colors). For these images, reducing to black and white is likely to be inappropriate – instead, you should reduce the image to as few colors as possible whilst still maintaining the necessary detail of the image. Scan2CAD comes equipped with a function to reduce colors automatically – it will map all colors in an image to a number of colors of your choosing. Learn more about editing raster colors here.
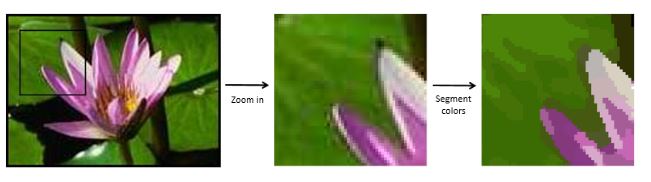
If you zoom into the rectangular marked part of the image on the left, you can see that ‘areas’ of the same apparent color are made up of pixels of many similar colors. To produce areas of consistent color we can use the Scan2CAD Segmentation tool. This will group areas of adjacent pixels of similar color/intensity into zones of color that best represent the original image. Here, we have segmented to just 16 colors to illustrate the process.
3. Clean the background
In the same vein as color reduction, you may need to clean your background even if it looks clear when zoomed out. If, for example, you have an image with a white background, you may have distortion bleeding into the white background. If you do not remove these distorted areas prior to vectorization, you will convert them to vector. In these cases, the fastest way to clean the image background is by reducing the colors.
Simple or Adaptive Threshold in the Raster Effects Menu will do the job for black and white images. The color segment tool will also achieve this for images formed of multiple colors.
4. Negate the image
This raster effect can be applied if you’ve got a negative image (white lines on black). Scan2CAD assumes that all images are positive images (black lines on white), so you may end up having very different results after vectorization.

Black on white or white on black?
5. Thicken lines
Gaps or broken lines are especially common when scanning pencil-drawn sketches or faint prints. Thickening the lines/pixels should be done with care since using this tool too liberally can result in unwanted joined lines or touching entities which would deteriorate the quality of your vector.
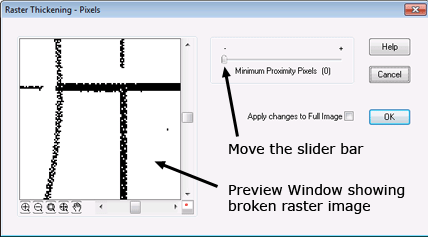
Even a beginner can easily clean up an image using the sliders and preview windows in Scan2CAD
6. Remove speckles
There are two ways to do this: either by using the Despeckle Tool or by manually erasing them using the Freehand Erase Tool. With the former, you can define how large the speckles are (in terms of pixels) and any marks of this size or larger would be automatically erased.
7. Remove holes
Just as there are stray pixels to remove, there are also gaps to fill in solid objects. Holes usually appear when the scan is too faint. The steps really are self-explanatory—just click Raster Effects > Clean > Remove Holes.
8. Smooth the image
How closely do you want to trace around the edges of your raster image? The Smooth Raster Effect removes “hairs” on your image, which are usually a result of scanning at too high a resolution, or when scanning a pencil-drawn sketch. The scanner then picks out details that aren’t usually visible by the human eye. If left un-smoothed, the conversion engine will draw vectors at these loose ends.
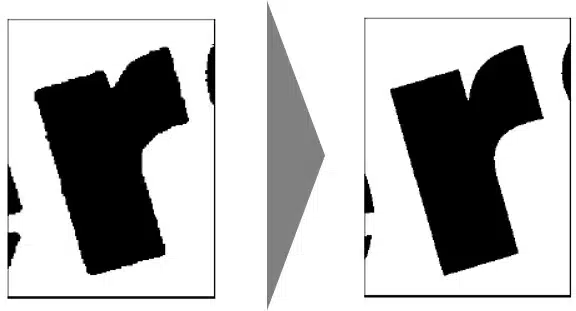
Notice the bumpy lines around the edges of the shape—these must be smoothed out in order to create a precise vector representation of your raster image.
9. Deskew the image
If images are scanned at a slight angle, what appears as straight lines in the raster image won’t be converted into clean, straight lines in the vector. Scan2CAD comes equipped with deskewing tools to fix these issues. However, heavy use of deskewing tools can have a negative impact on image quality, so if your image is very heavily skewed, it would be better to rescan the image (if possible) for optimum results.
10. Adding a border
Conversion engines cannot vectorize shapes that are right at the image edge. Luckily, this is quick to fix: simply select Raster Effects Menu > Border. Then, insert a suitable border width in pixels. Of course, if your scanned image has a large border or if you’ve inserted a border with too large a width, simply cropping the image would remove the unnecessary border.
Often times, it is necessary to apply few raster effects on the same image. Here’s an example. The higher zoom level reveals that the image is simply a series of irregular disconnected dots. We can improve this by thickening the pixels, removing speckles and holes and finally smoothening the edges before vectorization.
To learn more about each of these effects, check out our comprehensive user manual. On the other hand, if you’re curious and just want to test each feature out, then you can—you don’t even have to read the instructions! It’s easy to click on them and see how each feature works with your very own eyes.
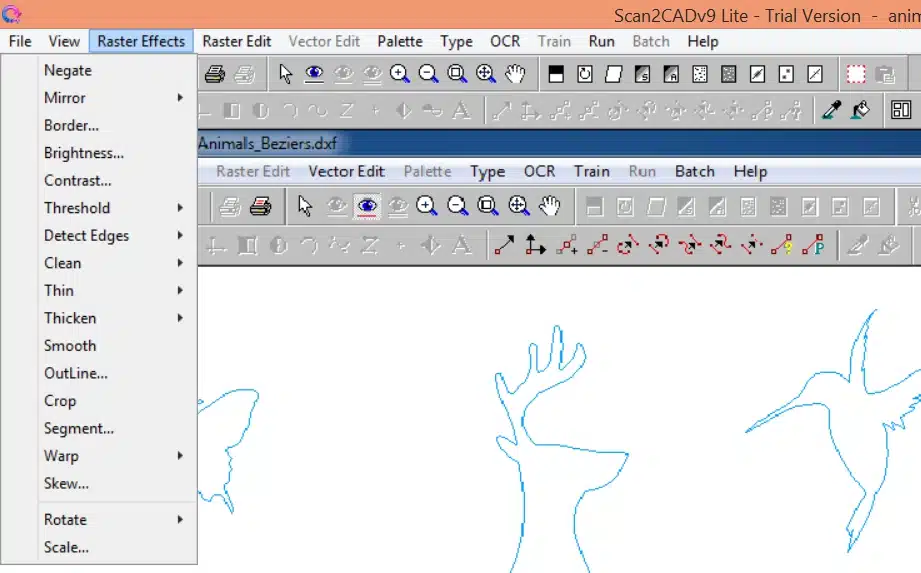
All of these raster effects can be found in the Scan2CAD toolbar
